Introduction: Unlocking Overhead Space with a Garage Storage Lift
Garages often become the catch-all of the home—bikes, bins, tools, and holiday decorations quickly pile up, leaving little room for vehicles or projects. If you’re frustrated by clutter and tripping hazards, a garage storage lift system offers a smart solution. By taking advantage of unused overhead space, these systems allow you to safely store seasonal items, sports gear, and bulky possessions out of the way yet conveniently accessible. Installing a garage storage lift might sound complicated or only suited for professionals, but with the right approach, tools, and safety precautions, many homeowners can tackle this rewarding project themselves.
This comprehensive guide will walk you through every aspect of installing an overhead garage storage lift system. You’ll learn how to choose the right system for your needs, accurately budget for the project, gather essential tools and equipment, and follow detailed, step-by-step installation instructions. We’ll also cover crucial safety essentials, regular maintenance tips, and common pitfalls to avoid. Whether your goal is to reclaim floor space, protect valuable items, or simply organize your garage, this guide will equip you with the knowledge you need to complete the job efficiently and safely.
Understanding Garage Storage Lift Systems
What Is a Garage Storage Lift?
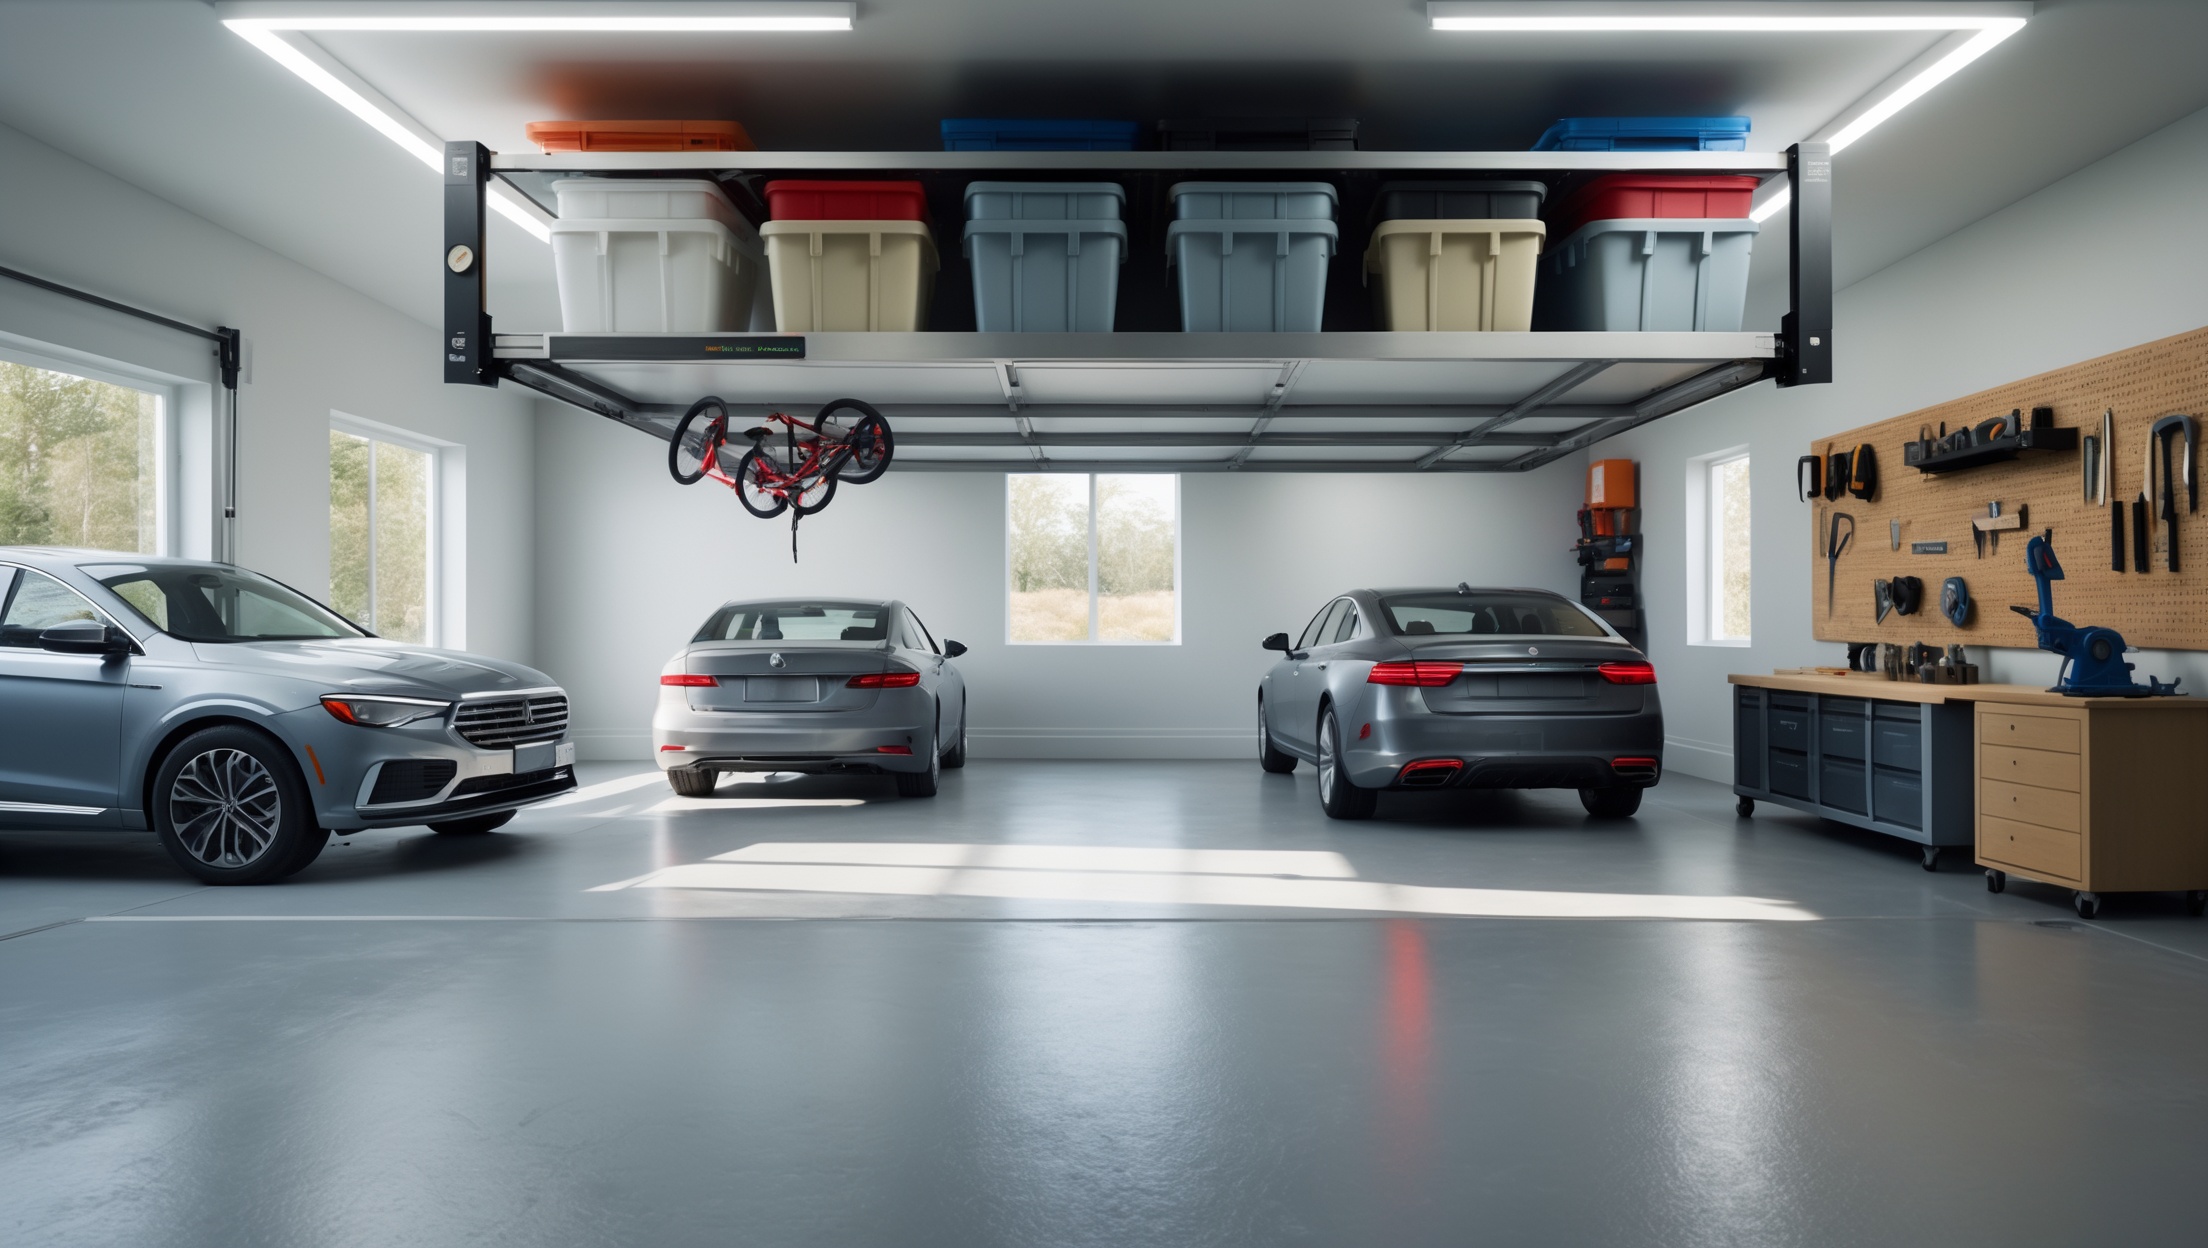
A garage storage lift is a ceiling-mounted platform or rack that can be raised and lowered mechanically, allowing for secure overhead storage of heavy or bulky items. Operated by manual cranks, pulleys, or motorized hoists, these systems maximize vertical space and reduce clutter at ground level.
Types of Storage Lifts
- Manual Pulley Systems: Operated by hand with ropes and pulleys. Best for lighter loads (up to 200 lbs).
- Crank-Operated Platforms: Use a hand crank and steel cables for heavier items (up to 500 lbs).
- Motorized Lifts: Controlled by a wired switch or remote, these can lift 250–600 lbs and are ideal for frequent use or very heavy loads.
Key Benefits
- Maximizes vertical storage capacity
- Reduces garage floor clutter
- Keeps valuables protected from water, pests, and impact
- Improves safety by eliminating tripping hazards
Planning and Budgeting for Your Garage Storage Lift
Assessing Your Storage Needs
Begin by evaluating what you want to store. Measure the largest items (bins, bikes, kayaks) and estimate their combined weight. Factor in future storage needs to avoid outgrowing your system.
Choosing the Right Lift System
Consider these factors:
- Weight Capacity: Match the lift to your heaviest items.
- Platform Size: Ensure it fits your space and intended loads.
- Ceiling Height: Verify adequate clearance for raising and lowering the platform.
- Ease of Use: Motorized systems are more convenient, but costlier.
- Compatibility: Confirm the lift can be mounted to your garage’s ceiling structure (joists, trusses).
Typical Cost Breakdown
- Manual Pulley System: $120–$250
- Crank-Operated Lift: $200–$400
- Motorized System: $350–$900
- Additional Materials (mounting hardware, lag bolts, wood blocking): $40–$80
- Tools (if not already owned): $75–$200 (drill, socket set, stud finder, safety gear)
- Optional Professional Installation: $250–$500
Total DIY Project Estimate: $250–$1,200 (system + materials + tools)
Budgeting Tips
- Shop seasonal sales or local hardware stores for discounts.
- Double-check included hardware to avoid extra trips mid-project.
- Factor in the cost of any electrical work if installing a motorized system.
Essential Tools and Equipment
Tool Checklist
- Cordless drill and drill bits
- Socket set and wrenches
- Stud finder
- Measuring tape
- Level (2-4 feet recommended)
- Step ladder or platform ladder (rated for your weight and height needed)
- Screwdrivers (Phillips and flathead)
- Pencil or chalk for marking
- Safety glasses and work gloves
- Dust mask (for older garages with debris)
- Circuit tester (if installing a motorized system)
Pre-Installation Preparation
- Clear the garage floor beneath the intended lift area.
- Check for overhead obstructions (lights, openers, ducts).
- Ensure joists or trusses are accessible and in good condition.
- Have a helper for lifting and alignment steps.
Safety Essentials Before You Start
Structural Considerations
- Never mount storage lifts to drywall or plaster alone—always anchor into solid wood joists or trusses.
- Check that your ceiling can support both the weight of the lift system and its maximum load.
- Consult a structural engineer if unsure about your garage’s load-bearing capacity.
Electrical Safety (Motorized Lifts)
- Ensure the power source is properly grounded and GFCI-protected.
- Turn off power at the breaker before working with wiring.
- If uncomfortable with electrical work, hire a licensed electrician.
Personal Protective Equipment (PPE)
- Always wear safety glasses to prevent eye injuries from dust or debris.
- Use work gloves to protect your hands from sharp hardware and tools.
- Wear sturdy, closed-toe shoes with good grip.
Step-by-Step Installation Guide
1. Mark and Measure Mounting Points
Use a stud finder to locate ceiling joists or trusses. Mark these clearly. Measure and mark the exact positions where the lift’s mounting brackets or rails will be installed, ensuring they align with manufacturer spacing requirements and your intended platform placement.
2. Pre-Drill Mounting Holes
With your helper, hold the mounting hardware in place and mark pilot holes on the joists. Pre-drill holes slightly smaller than your lag bolts to prevent splitting the wood and ensure a secure fit.
3. Secure Mounting Hardware
Use a socket set or wrench to tighten lag bolts into the pre-drilled holes. Double-check that all brackets or rails are level and firmly anchored. Do not overtighten, which could damage the hardware or weaken the wood.
4. Assemble the Lift Platform or Rack
Follow the manufacturer’s assembly instructions to put together the platform or rack, ensuring all bolts and fasteners are secure. If storing irregular items (like bikes or kayaks), attach any specialized hooks or straps as directed.
5. Attach Cables or Lifting Mechanism
Connect steel cables, pulleys, or lifting arms as specified. Ensure cables are not twisted or kinked, and that all connections are secure. Test the mechanism without load to confirm smooth operation.
6. Install Motor (If Applicable)
Mount the motor unit according to instructions, ensuring it is supported by the ceiling structure. Run wiring to a dedicated, grounded outlet. Connect controls (remote, wall switch) and test the motorized lift several times before loading any items.
7. Test the System
With your helper, gradually add weight to the platform and operate the lift. Observe for any signs of stress, unusual sounds, or instability. Never exceed the manufacturer’s rated capacity.
Post-Installation Maintenance Best Practices
Monthly Inspection Checklist
- Visually check all bolts, cables, and mounting points for signs of wear or loosening.
- Test operation (raise/lower) to ensure smooth movement and no unusual noises.
- Lubricate pulleys, cranks, and motorized parts as recommended by the manufacturer.
- Inspect electrical connections on motorized systems for fraying or corrosion.
Annual Deep Maintenance
- Remove platform and thoroughly clean all components.
- Tighten all fasteners and check for wood or metal fatigue.
- Replace any damaged or worn cables immediately.
- Update safety labels or signage as needed.
Common Mistakes and How to Avoid Them
- Skipping the Stud Finder: Anchoring into drywall alone leads to catastrophic failure. Always locate and use solid joists or trusses.
- Ignoring Weight Ratings: Overloading the lift can damage your home and risk injury. Stay well below the maximum capacity.
- Improper Leveling: A sloped or uneven platform causes shifting loads and instability. Double-check with a level during installation.
- Neglecting Regular Maintenance: Uninspected systems can develop dangerous faults. Set calendar reminders for monthly and annual checks.
- Poor Wiring Practices (Motorized): Unsafe electrical work is a fire and shock hazard. When in doubt, hire a pro.
Safety Checklist for Ongoing Use
- Only operate the lift when the area underneath is clear of people, pets, and vehicles.
- Never stand on or ride the lift platform.
- Keep children and unauthorized users away from controls.
- Store items evenly distributed to maintain balance.
- Immediately address any frayed cables, loose bolts, or odd noises.
Conclusion: Transforming Your Garage with Smart, Safe Storage
Installing a garage storage lift system is a practical, high-impact way to declutter your space and make your garage safer and more efficient. By investing in a quality lift and taking the time to plan, budget, and install it correctly, you’ll open up valuable floor space and keep your belongings protected from damage. The process requires careful attention to detail—especially with mounting, weight limits, and regular maintenance—but the payoff is well worth it. Always prioritize safety: use the right tools, anchor into solid structure, and never cut corners with load ratings or electrical work. Make inspections part of your routine so the system stays reliable for years to come.
With your new overhead storage lift, you can finally reclaim your garage—not just for parking, but for hobbies, projects, and organized living. Whether you’re storing holiday decorations, sports equipment, or rarely used tools, these systems add both functionality and value to your home. Start planning your installation today and enjoy a cleaner, safer, and more versatile garage space tomorrow.


I noticed the article mentions different types of garage storage lifts, like manual pulley systems and motorized lifts. How do I determine which type is most suitable if my garage ceiling isn’t very high or has obstructions like beams?
When your garage ceiling is low or has beams, measuring the available vertical space is key. Manual pulley systems usually require less overhead clearance and can often be mounted around obstructions. Motorized lifts often need more headroom for their motors and mechanisms. Take note of your ceiling height, the size of items you want to store, and the locations of any beams to help you choose a system that fits safely and operates smoothly.