Introduction: Unlocking the Hidden Potential of Your Attic
Most homeowners overlook the attic, relegating it to a dusty, unused space or a haphazard dumping ground for seasonal items. However, with a strategic approach, your attic can become a functional, organized storage area that adds significant value to your home. Converting an attic for storage is not just about tossing boxes under the rafters—proper planning, budgeting, and safety considerations are crucial to avoid costly mistakes and ensure that your stored belongings remain protected year-round. This comprehensive guide will walk you through every aspect of maximizing attic storage, from understanding costs and compliance to selecting materials, addressing insulation and ventilation, and following a detailed, step-by-step installation process. Whether you’re a DIY enthusiast or a homeowner looking to use space more efficiently, you’ll find practical advice to help you transform your attic into a safe, accessible, and durable storage solution.
Understanding Attic Storage: Types, Benefits, and Limitations
Types of Attic Storage Solutions
- Simple Floor Boarding: Adding plywood or OSB panels across joists for basic storage of lightweight items.
- Shelving Systems: Installing shelves between rafters or along walls for bins, boxes, and tools.
- Built-in Cabinets: Custom cabinetry for homes with larger attic spaces, ideal for organization.
- Hanging Storage: Using hooks and racks for bikes, ladders, or seasonal equipment.
Benefits of Attic Storage
- Frees up valuable living and garage space.
- Keeps seasonal or infrequently used items out of sight but accessible.
- Can increase home resale value when done to code and with quality materials.
Limitations and Cautions
- Attics are not designed for heavy loads; improper conversion can damage your home’s structure.
- Poor ventilation or insulation can damage stored items.
- Access and egress must remain safe—never block attic entrances or emergency exits.
Budgeting and Cost Breakdown
Assessing Your Attic’s Suitability
Before budgeting, assess whether your attic can safely accommodate storage. Key factors include joist size and spacing, headroom, access (e.g., pull-down stairs or permanent staircase), and existing insulation. If unsure, consult a structural engineer or home inspector.
Basic Cost Components
- Materials:
- Plywood or OSB panels ($30–$50 per sheet, typically 4’x8′)
- Screws, construction adhesive, and blocking lumber ($30–$100 total)
- Shelving brackets, wire shelves, or custom cabinetry ($50–$500+ depending on complexity)
- Insulation upgrades, if needed ($0.80–$2.00 per sq. ft.)
- Attic ladder or stair replacement ($150–$700)
- Lighting fixtures and wiring ($50–$300)
- Labor: Professional installation ranges from $40–$80 per hour. DIY can save substantially, but may increase time investment.
- Permits: Required in many municipalities for structural work or electrical upgrades ($50–$250).
Sample Project Budgets
- Basic DIY Floor Boarding (150 sq. ft.): $400–$800
- Mid-Range Project (Flooring + Shelving + Lighting): $1,000–$2,500
- Professional, Custom Storage Buildout: $3,000–$7,500+
Compliance and Permits: What’s Required?
Before starting your attic storage project, research local building codes. Some projects—especially those involving structural changes, electrical work, or significant insulation upgrades—require permits. Common triggers for permits include:
- Installing or reinforcing attic flooring
- Running new electrical wiring for lighting or outlets
- Adding permanent stairs or enlarging existing access
Contact your city or county building department for specific requirements. Failing to secure permits can result in fines or complications during home resale.
Safety First: Essential Precautions for Attic Projects
Structural Load Limits
Most attic joists are engineered to support ceiling drywall and minimal weight—not heavy storage. Overloading can cause sagging ceilings or even structural failure. Calculate safe load limits:
- Standard ceiling joists: 10–20 lbs per sq. ft. (consult local building codes)
- Reinforced or sistered joists: 30–40 lbs per sq. ft.
For heavy storage, consider hiring a contractor to reinforce joists with “sistering” (attaching additional lumber to existing joists).
Ventilation and Moisture Control
Attics are prone to extreme temperatures and humidity. Poor ventilation can damage stored items and foster mold or mildew. Ensure that soffit, ridge, or gable vents are unobstructed, and avoid covering insulation with solid boards that trap moisture.
Electrical Safety
If adding lighting, use only code-approved fixtures rated for attic use. All wiring should be run in conduit or behind protective panels to avoid fire risk. Never bury junction boxes beneath flooring.
Personal Safety
- Wear a dust mask, gloves, and eye protection—attics often harbor insulation fibers, dust, and animal droppings.
- Use a stable ladder and never work alone in case of a fall.
- Stay on joists or installed flooring; stepping between joists may break through the ceiling below.
Choosing the Right Materials
Flooring
- Plywood: 3/4″ tongue-and-groove is ideal for strength and stability.
- OSB (Oriented Strand Board): Less expensive, but may sag over time in humid environments.
- Avoid particleboard or MDF, which can swell or weaken with moisture exposure.
Insulation and Vapor Barriers
- Upgrade insulation if current levels are below R-30 (colder climates may require up to R-49).
- Use rigid foam panels or blown-in insulation for efficiency.
- Install vapor barriers on the warm side if required by climate.
Shelving and Storage Systems
- Wire shelving is lightweight and allows airflow.
- Metal or adjustable shelving units for flexible storage.
- Custom built-ins for sloped ceilings or awkward spaces.
Step-by-Step Attic Storage Installation Guide
1. Empty and Inspect the Attic
- Remove all stored items and debris.
- Inspect for leaks, mold, or pest activity and address before proceeding.
2. Plan Layout and Mark Storage Zones
- Determine where flooring, shelves, and access paths will go.
- Mark load-bearing joists and avoid placing heavy items near unsupported spans.
3. Reinforce Joists (if necessary)
- Sister additional 2×6 or 2×8 boards to existing joists for extra strength.
- Secure with screws and construction adhesive.
4. Install Insulation Upgrades
- Lay or blow in insulation between joists.
- Install baffles to maintain airflow at eaves.
- Add vapor barrier where necessary.
5. Lay Attic Flooring
- Cut plywood or OSB panels to fit between rafters.
- Leave a 1/8” gap between panels for expansion.
- Screw panels securely into joists; avoid nailing, which can loosen over time.
- Do not cover recessed lights or electrical junction boxes.
6. Install Lighting and Electrical (if adding)
- Run wiring through conduit and secure with cable staples.
- Install code-approved LED fixtures suitable for attic temperatures.
- Have work inspected if required by code.
7. Build or Mount Shelving and Storage Units
- Use lag bolts for heavy shelves; secure shelves to studs or rafters where possible.
- Ensure units do not block vents or restrict airflow.
- Position shelving along perimeter to maximize open floor space.
8. Create Safe Access and Egress
- Test folding stairs or ladders for stability.
- Consider handrails if using permanent stairs.
- Ensure path to access hatch or stairs remains clear at all times.
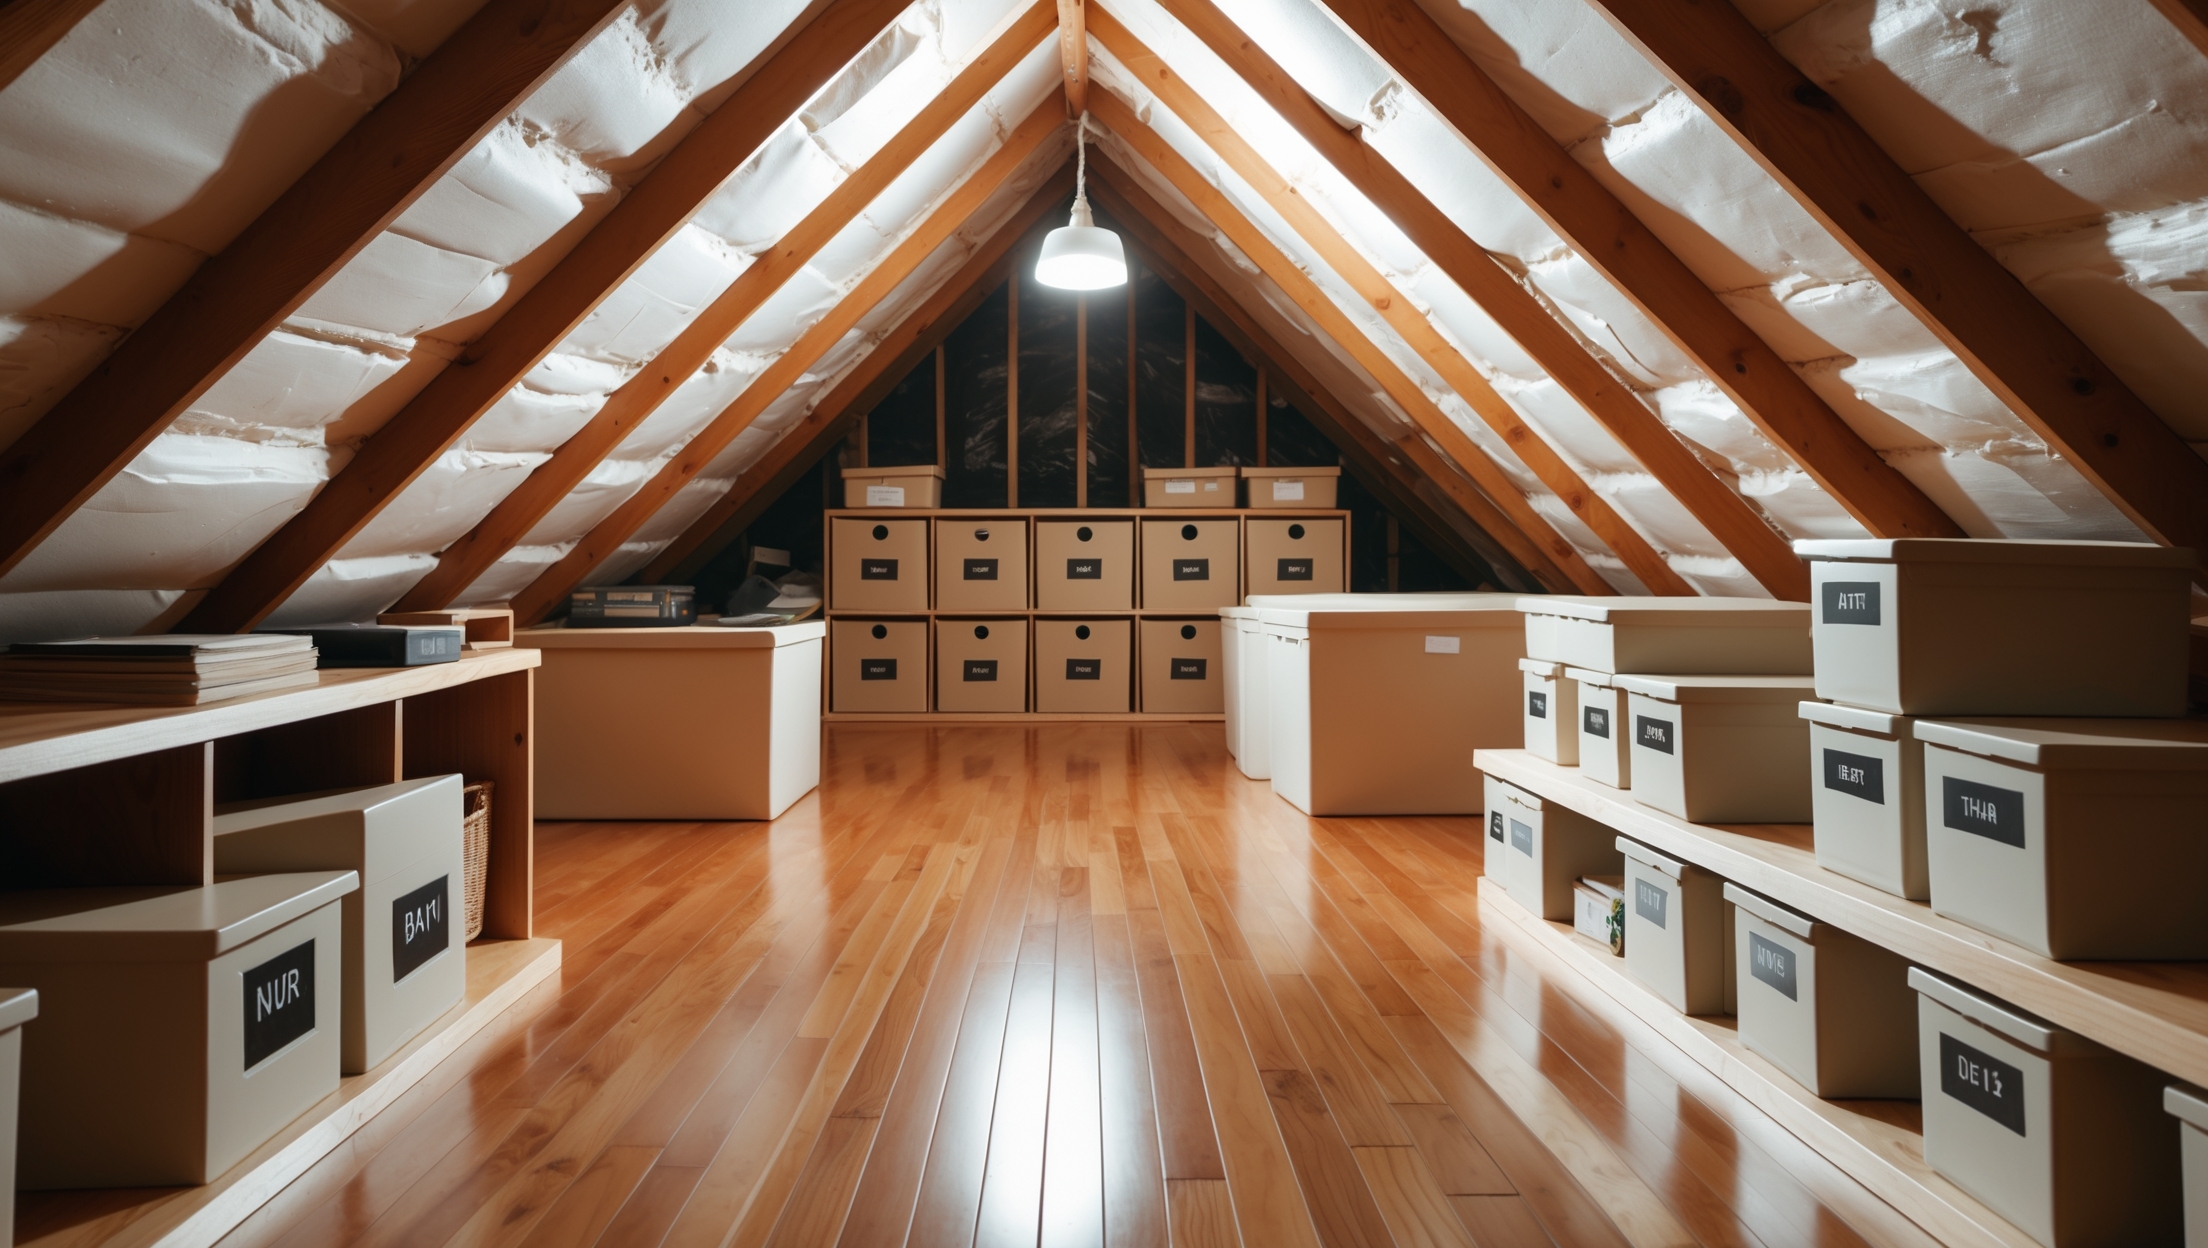
9. Organize and Label Storage
- Use clear bins for visibility and moisture resistance.
- Label containers for quick identification.
- Store heavier items closest to access point; lighter or seasonal items farther back.
Maintenance Best Practices for Attic Storage
- Inspect attic at least every six months for leaks, pests, or insulation settling.
- Check that vents remain unobstructed and that no condensation is forming on rafters or stored items.
- Clean up dust and debris regularly to deter pests.
- Re-tighten screws and check for any sagging panels annually.
- Rotate stored items seasonally to ensure nothing is forgotten or damaged.
Common Myths About Attic Storage—Debunked
- Myth: “Any attic can be used for storage.”
Fact: Structural limitations and poor ventilation can make some attics unsuitable without upgrades. - Myth: “You don’t need permits for attic work.”
Fact: Many municipalities require permits for flooring, electrical, or insulation upgrades. - Myth: “You can store anything in the attic.”
Fact: Avoid storing delicate electronics, photos, or items sensitive to temperature swings.
Case Study: Transforming a Cluttered Attic into Organized Storage
Background: The Smith family had an underutilized attic, cluttered with old boxes and inaccessible items. After suffering a minor ceiling crack due to overloading, they decided on a structured storage upgrade.
Steps Taken:
- Consulted a contractor to reinforce ceiling joists and ensure safe load-bearing capacity.
- Removed old insulation and upgraded to R-38 with vapor barrier installation.
- Installed 3/4″ plywood flooring and wire shelving along two sides.
- Added LED lighting and a new attic ladder for safer access.
- Organized belongings in clear, labeled bins with a digital inventory list.
Results: The project cost $2,200, took one weekend, and yielded a clean, organized, and now-safe attic with 30% more usable space and zero structural concerns.
Conclusion: Making Your Attic Work for You
Attic storage upgrades are among the most rewarding home improvement projects, offering an opportunity to reclaim space, reduce household clutter, and potentially increase your home’s value. However, successful attic storage is about more than simply boarding over joists and stacking boxes. It requires careful assessment of your attic’s structure, smart budgeting, compliance with building codes, and a strong focus on safety and moisture control. By following the detailed steps outlined above—from initial inspection and reinforcement, through material selection and installation, to maintenance and organization—you can transform your attic into a durable, efficient storage area for years to come. Remember, investing a little extra time in planning and proper technique now will prevent costly repairs or hazards down the road. Whether you’re a seasoned DIYer or tackling this project for the first time, prioritize load limits, ventilation, and safe access every step of the way. With the right approach, your attic can become one of the most valuable—and organized—spaces in your home.

When installing plywood or OSB panels across attic joists for simple floor boarding, how do you determine if your attic can safely support the extra weight, especially in older homes?
To check if your attic can safely handle the extra weight, start by identifying the size and spacing of your joists—most attics with 2×6 joists spaced 16 inches apart can support only light storage. Look for sagging or cracks as warning signs. For older homes, it’s wise to consult a structural engineer or a qualified contractor who can assess your attic’s load capacity before adding any flooring or heavy items.