Introduction: Why Paint Prep Matters in Home Improvement
Paint can instantly transform the look and feel of any room, making it one of the most popular and cost-effective home improvement projects. Yet, many DIY enthusiasts—and even some seasoned renovators—rush the preparation stage or skip crucial steps, resulting in uneven finishes, premature peeling, and wasted time and money. Proper paint prep is the difference between a flawless, professional-looking result and a job that needs to be redone far sooner than expected.
In this comprehensive guide, we’ll walk you through the essential steps of DIY paint preparation, highlight common mistakes to avoid, and share expert insights for tackling walls, trim, and ceilings. Whether you’re refreshing a single accent wall or embarking on a whole-house makeover, mastering the art of paint prep will ensure your efforts stand the test of time and add real value to your home.
Understanding the Paint Prep Process: An Overview
Before you touch a paintbrush or roller, thorough preparation is key. Here’s what a robust paint prep routine should include:
- Assessing and cleaning surfaces
- Repairing damage (holes, cracks, peeling paint)
- Sanding for a smooth finish
- Protecting adjoining surfaces with masking and drop cloths
- Choosing and applying the right primer
Each step impacts the quality, durability, and appearance of your final paint job. Skipping or rushing any part can lead to visible flaws, adhesion problems, or costly do-overs.
Step 1: Assessing and Cleaning Surfaces
Why Cleanliness is Crucial
Dirt, dust, grease, and residues all prevent paint from bonding properly. Unseen contaminants can cause blistering, bubbling, and patchy coverage. A pristine surface is non-negotiable for quality results.
Effective Cleaning Techniques
- Walls and Ceilings: Use a microfiber duster to remove cobwebs and loose dust. Follow with a sponge or cloth and a solution of mild dish soap and warm water. For stubborn stains (like crayon or smoke), use a degreaser or a diluted vinegar solution. Rinse and let dry completely.
- Trim and Woodwork: Degrease with trisodium phosphate (TSP) or a TSP substitute. Scrub gently to avoid damaging wood fibers.
- Bathrooms/Kitchens: Pay special attention to areas exposed to moisture and cooking residues. Mold or mildew should be treated with a bleach solution (1 part bleach to 3 parts water) and allowed to dry thoroughly.
Step 2: Repairing Surface Imperfections
Identifying and Filling Holes or Cracks
Even small imperfections will show through fresh paint. Inspect every surface in bright, natural light. Mark holes, dents, nail pops, and cracks with painter’s tape as you go.
- Small Holes: Fill with lightweight spackle. Apply with a putty knife, feathering the edges. Allow to dry, then sand smooth.
- Cracks: For hairline cracks, use paintable acrylic caulk. Deeper cracks may require patching compound or mesh tape for reinforcement.
- Peeling or Flaking Paint: Scrape away loose paint with a putty knife or paint scraper. Feather the edges with sandpaper so the repair blends seamlessly.
Addressing Water Damage and Stains
Stains from leaks or previous repairs will bleed through paint unless properly treated. For water stains, use a stain-blocking primer after repairs. If there’s active moisture, fix the source before proceeding.
Step 3: Sanding for a Smooth Finish
Choosing the Right Sandpaper
Sanding smooths patched areas, dulls glossy surfaces, and helps new paint adhere. Use fine-grit sandpaper (120- to 150-grit for walls, 180- to 220-grit for trim).
- Walls: Sand over spackled areas and feather into surrounding wall. For glossy finishes, a light sanding over the entire surface is recommended.
- Trim and Woodwork: Sand to remove bumps, drips, or old brush marks. Wipe down with a tack cloth to remove dust.
Tools for Efficient Sanding
- Hand sanding block for small repairs
- Pole sander for walls and ceilings
- Detail sander for corners and trim
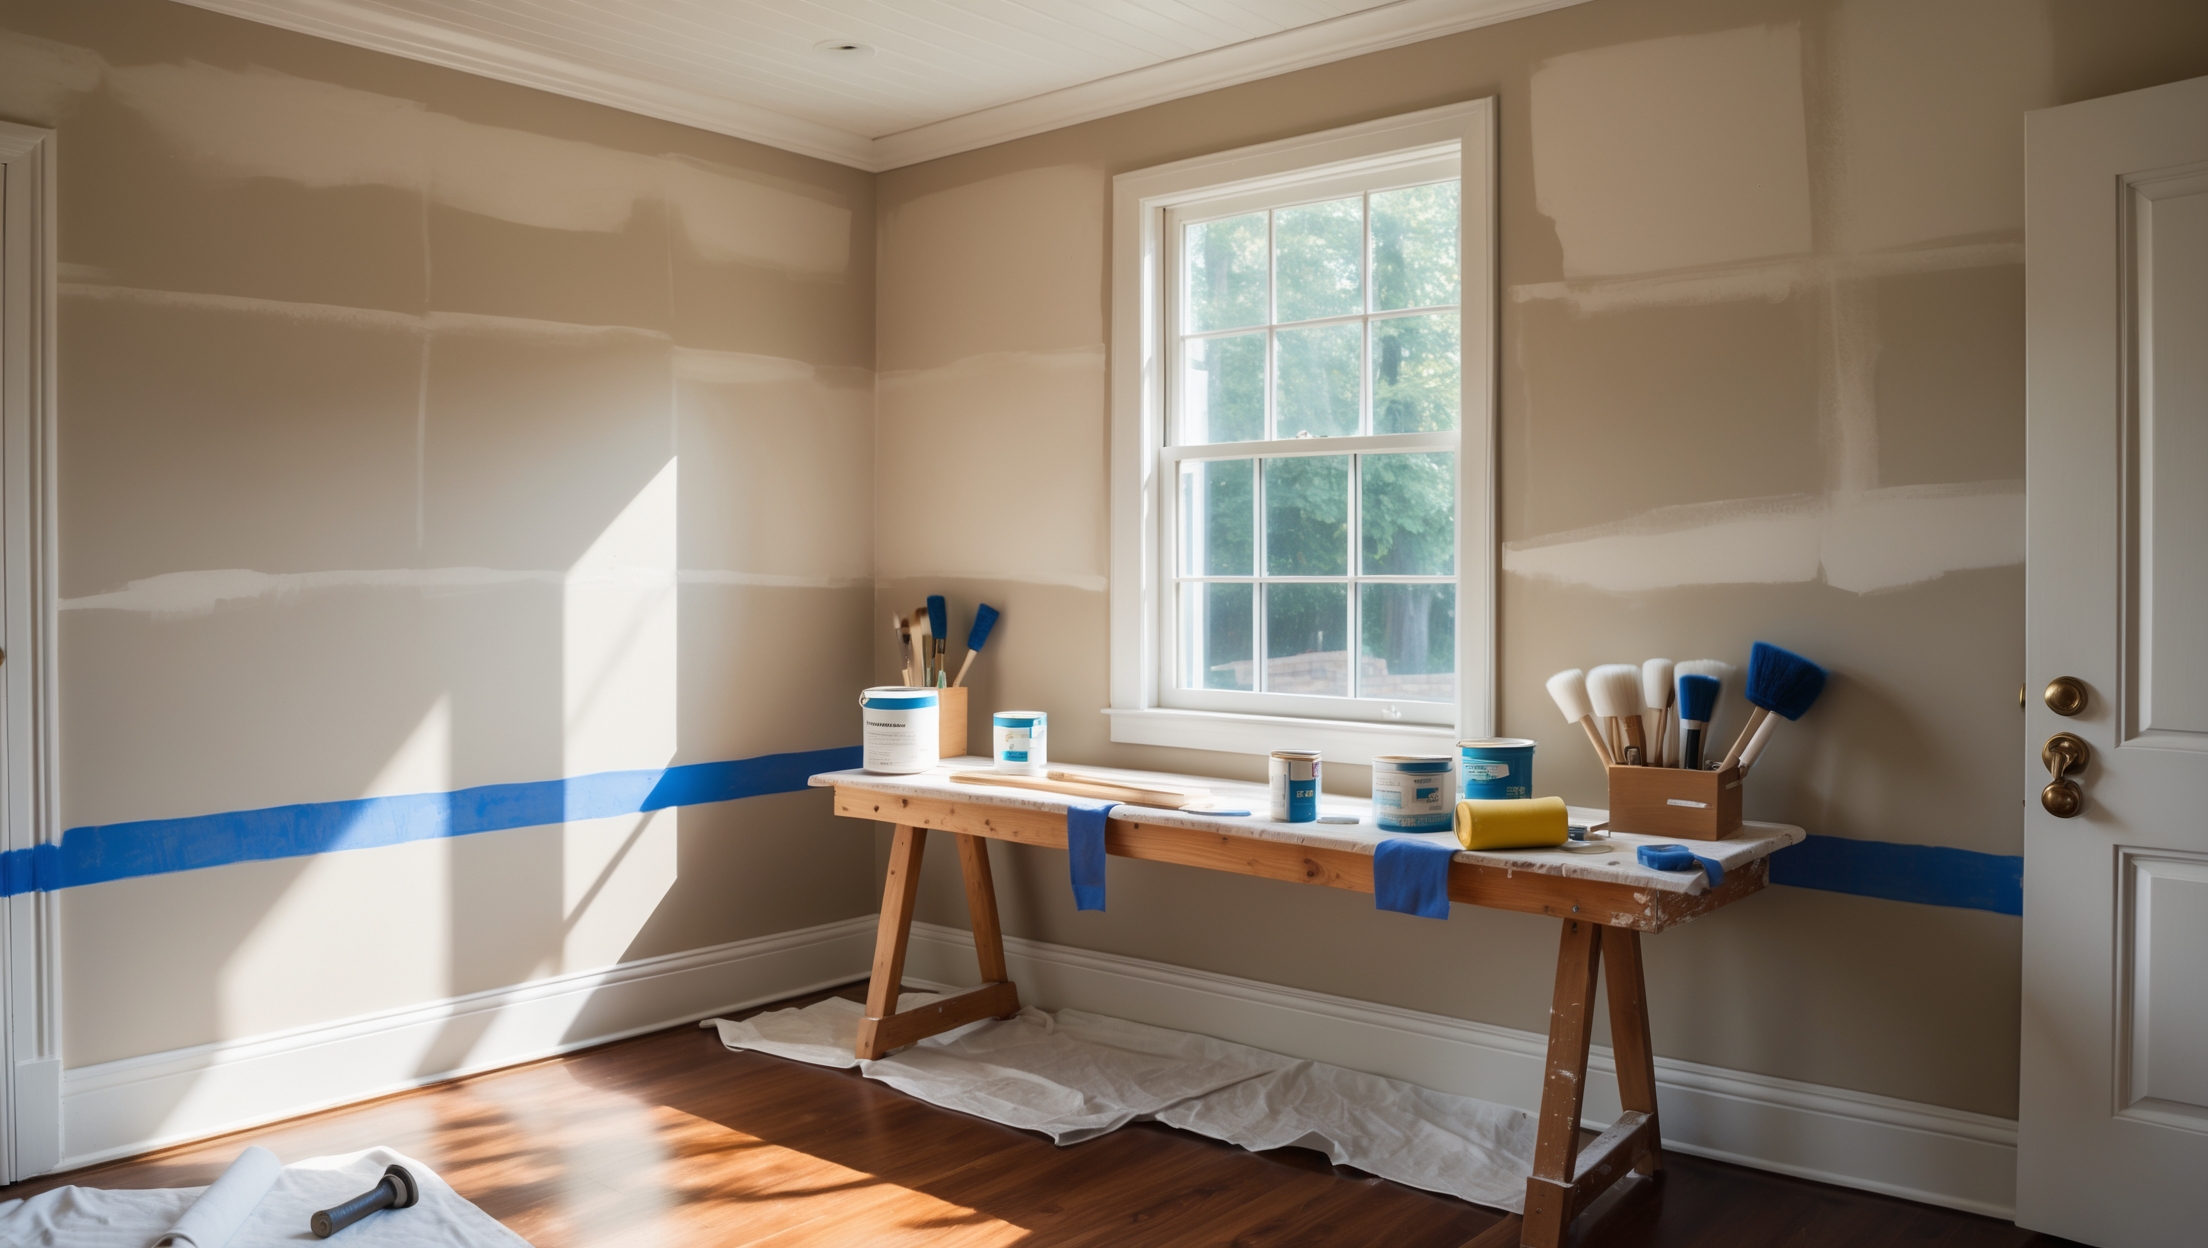
Step 4: Masking and Protecting Surfaces
Choosing the Right Materials
- Painters Tape: Use high-quality, residue-free tape for sharp paint lines. Select the correct width based on the area being masked.
- Drop Cloths: Canvas for floors (reusable and slip-resistant), plastic for furniture or fixtures.
- Plastic Sheeting: Great for windows, doors, and large built-ins.
Pro Masking Techniques
- Run a putty knife over tape edges to seal and prevent paint bleed.
- Remove tape when paint is slightly wet for cleaner lines.
- Cover outlets and switches with removable covers or tape.
Step 5: Priming—When and Why It’s Essential
When to Prime
- Over patched or repaired areas
- On bare drywall or wood
- When changing from dark to light colors (or vice versa)
- To seal stains or odors
- On glossy or previously oil-based painted surfaces
Types of Primers
- Latex Primer: Quick-drying, ideal for drywall and bare wood.
- Oil-based Primer: Best for heavy stains, high-traffic areas, and preventing tannin bleed from wood.
- Shellac-based Primer: Ultimate stain-blocker for water, smoke, and severe discoloration.
Application Tips
- Use a brush for edges and a roller for large surfaces.
- Allow full drying time as indicated on the label before painting.
- Sand lightly after priming for a glass-smooth finish.
Common DIY Paint Prep Mistakes (and How to Avoid Them)
- Skipping the Clean: Dust, grease, or soap residue will ruin adhesion. Always clean, even if walls “look” clean.
- Neglecting Repairs: Paint won’t hide flaws—patch and sand every imperfection.
- Improper Masking: Rushed taping leads to crooked lines and paint bleed. Take your time and press tape firmly.
- Wrong Primer (or None): Primer isn’t just for new drywall. Any patches, stains, or color changes need it.
- Painting Over Wet Surfaces: Moisture under paint causes blistering and peeling. Allow everything to dry thoroughly at each stage.
- Using Low-Quality Materials: Cheap tape, drop cloths, or tools can sabotage your work. Invest in pro-grade supplies for the best results.
- Poor Surface Lighting: Inadequate lighting hides defects. Use strong, portable work lights to spot every flaw during prep.
Essential Tools and Supplies for Flawless Prep
- Step ladder or platform
- Microfiber dusters and cleaning sponges
- Putty knives and spackling/patching compound
- Sandpaper (various grits) and sanding blocks
- Tack cloths for dust removal
- Painters tape (multiple widths)
- Drop cloths (canvas and plastic)
- High-quality primer for your surface type
- Caulking gun and paintable caulk
- Scrapers and utility knife
- Work lights or portable lamps
Paint Prep Checklist: Step-by-Step
- Remove furniture or cover with plastic sheeting.
- Dust and wash all surfaces to be painted.
- Inspect for damage; mark with painter’s tape.
- Patch holes, cracks, and imperfections. Let dry.
- Sand patched areas and glossy surfaces. Remove dust.
- Mask trim, windows, outlets, and switches.
- Lay drop cloths to protect floors and fixtures.
- Apply primer where needed; allow to dry fully.
- Lightly sand primed areas and remove dust.
- Double-check for missed spots before painting.
Special Considerations: Kitchens, Bathrooms, and High-Traffic Areas
Moisture and Mildew Prevention
In bathrooms and kitchens, always use a mildew-resistant primer and ensure the area is completely dry before painting. Use caulk to seal gaps where moisture can intrude, such as along tubs, backsplashes, and windowsills.
Heavy Use Areas
Hallways and children’s rooms demand extra-durable finishes. Opt for a primer that enhances scrub resistance and paint adhesion.
Expert Tips for Professional-Quality Results
- Work from top to bottom: Start with ceilings, then walls, finishing with trim and baseboards.
- Maintain a “wet edge” during painting to avoid lap marks—made possible by smooth, properly primed surfaces.
- Keep a clean workspace; dust and debris can settle on wet paint and ruin the finish.
- Allow extra drying time in humid or cool conditions.
- Store leftover primer and patch material sealed tightly for future touch-ups.
Conclusion: Prep Right, Paint Once
Rushing into a painting project without adequate preparation is a recipe for disappointment. The time and effort invested in cleaning, repairing, sanding, masking, and priming will pay off with a finish that looks professional, wears beautifully, and won’t need redoing for years. Most paint failures—peeling, bubbling, uneven color—are the result of poor prep, not the paint itself.
By following a methodical approach and avoiding the most common mistakes, you set yourself up for success on every home improvement project, whether it’s a quick refresh or a dramatic transformation. Remember, every stunning paint job starts long before the first coat is applied. Take pride in your preparation, and you’ll enjoy flawless results that boost your home’s value, comfort, and appeal for years to come.
Ready to tackle your next painting project? Gather your supplies, use this guide as your step-by-step reference, and prep like a pro. The difference will be visible the moment you put down the roller—and for many years after.

When you mention repairing damage like holes or cracks before painting, do you have any advice on how to know if a crack is just cosmetic or something that points to a bigger issue behind the wall?
That’s a smart question because not all cracks are the same. If a crack is wider than a quarter inch, runs diagonally, or keeps reappearing after repairs, it could signal an underlying structural issue, like foundation settling or water damage. Hairline and straight cracks are usually cosmetic. If you’re unsure, it’s best to consult a professional before painting to make sure there aren’t any hidden problems.