
Introduction: Why Replace Old Light Fixtures?
Lighting is one of the most impactful elements in any home, affecting everything from ambiance to energy efficiency. Outdated or malfunctioning light fixtures can not only make your living space look drab but can also be a potential safety hazard. Flickering lights, buzzing sounds, or frequent bulb replacements are telltale signs it’s time for an upgrade. Whether you’re aiming to modernize your home’s appearance, improve illumination, or reduce your energy bill, replacing old light fixtures is a practical and rewarding project. However, this process isn’t just about aesthetics—there are crucial safety, compliance, and cost considerations to weigh before you begin. In this comprehensive guide, we’ll walk you through every step: evaluating fixture replacement costs, understanding compliance and permit requirements, gathering the right tools, and executing the swap safely and efficiently. By the end, you’ll have the knowledge and confidence to transform your home’s lighting with professional-level results.
Cost Breakdown: What to Expect When Replacing Fixtures
Fixture Costs: From Budget to Luxury
The cost of a new light fixture can vary dramatically based on style, quality, and functionality. Here’s what to expect:
- Basic Ceiling Fixtures: $15–$50 (flush mounts, simple pendants)
- Mid-Range Fixtures: $60–$200 (chandeliers, designer pendants, modern sconces)
- High-End Fixtures: $250–$1,000+ (custom designs, smart lighting, specialty materials)
Other Material Expenses
- Bulbs: $3–$20 each depending on type and efficiency
- Wire connectors, mounting hardware: $5–$15
- Optional dimmer switches: $20–$60
Labor Costs (If Hiring a Pro)
- Electrician labor: $65–$130 per hour
- Typical total labor for a single fixture swap: $75–$200
For a basic DIY replacement, expect to spend $25–$250 in total, while a professional installation might range from $100–$1,300 depending on fixture type and complexity.
Compliance and Permits: Staying Within the Law
Do You Need a Permit?
Most municipalities do not require a permit for simply swapping an existing light fixture for a new one, provided you are not altering wiring or the electrical circuit. However, permits are typically required if you:
- Install new wiring or relocate an electrical box
- Upgrade the amperage or add new circuits
- Make changes in a multi-family or rental property
Always check your local building department’s website or call for clarification before starting.
Electrical Code Essentials
Even for basic fixture swaps, you must follow the National Electrical Code (NEC) and local amendments. Key rules include:
- All fixtures must be UL-listed for indoor use and match the application (e.g., damp-rated for bathrooms)
- Electrical boxes must be securely attached and sized for the number of wires
- Ground wires must be properly attached
- Use wire connectors rated for the wire gauge
If your home’s wiring is old (e.g., knob-and-tube, aluminum), consult a licensed electrician before proceeding.
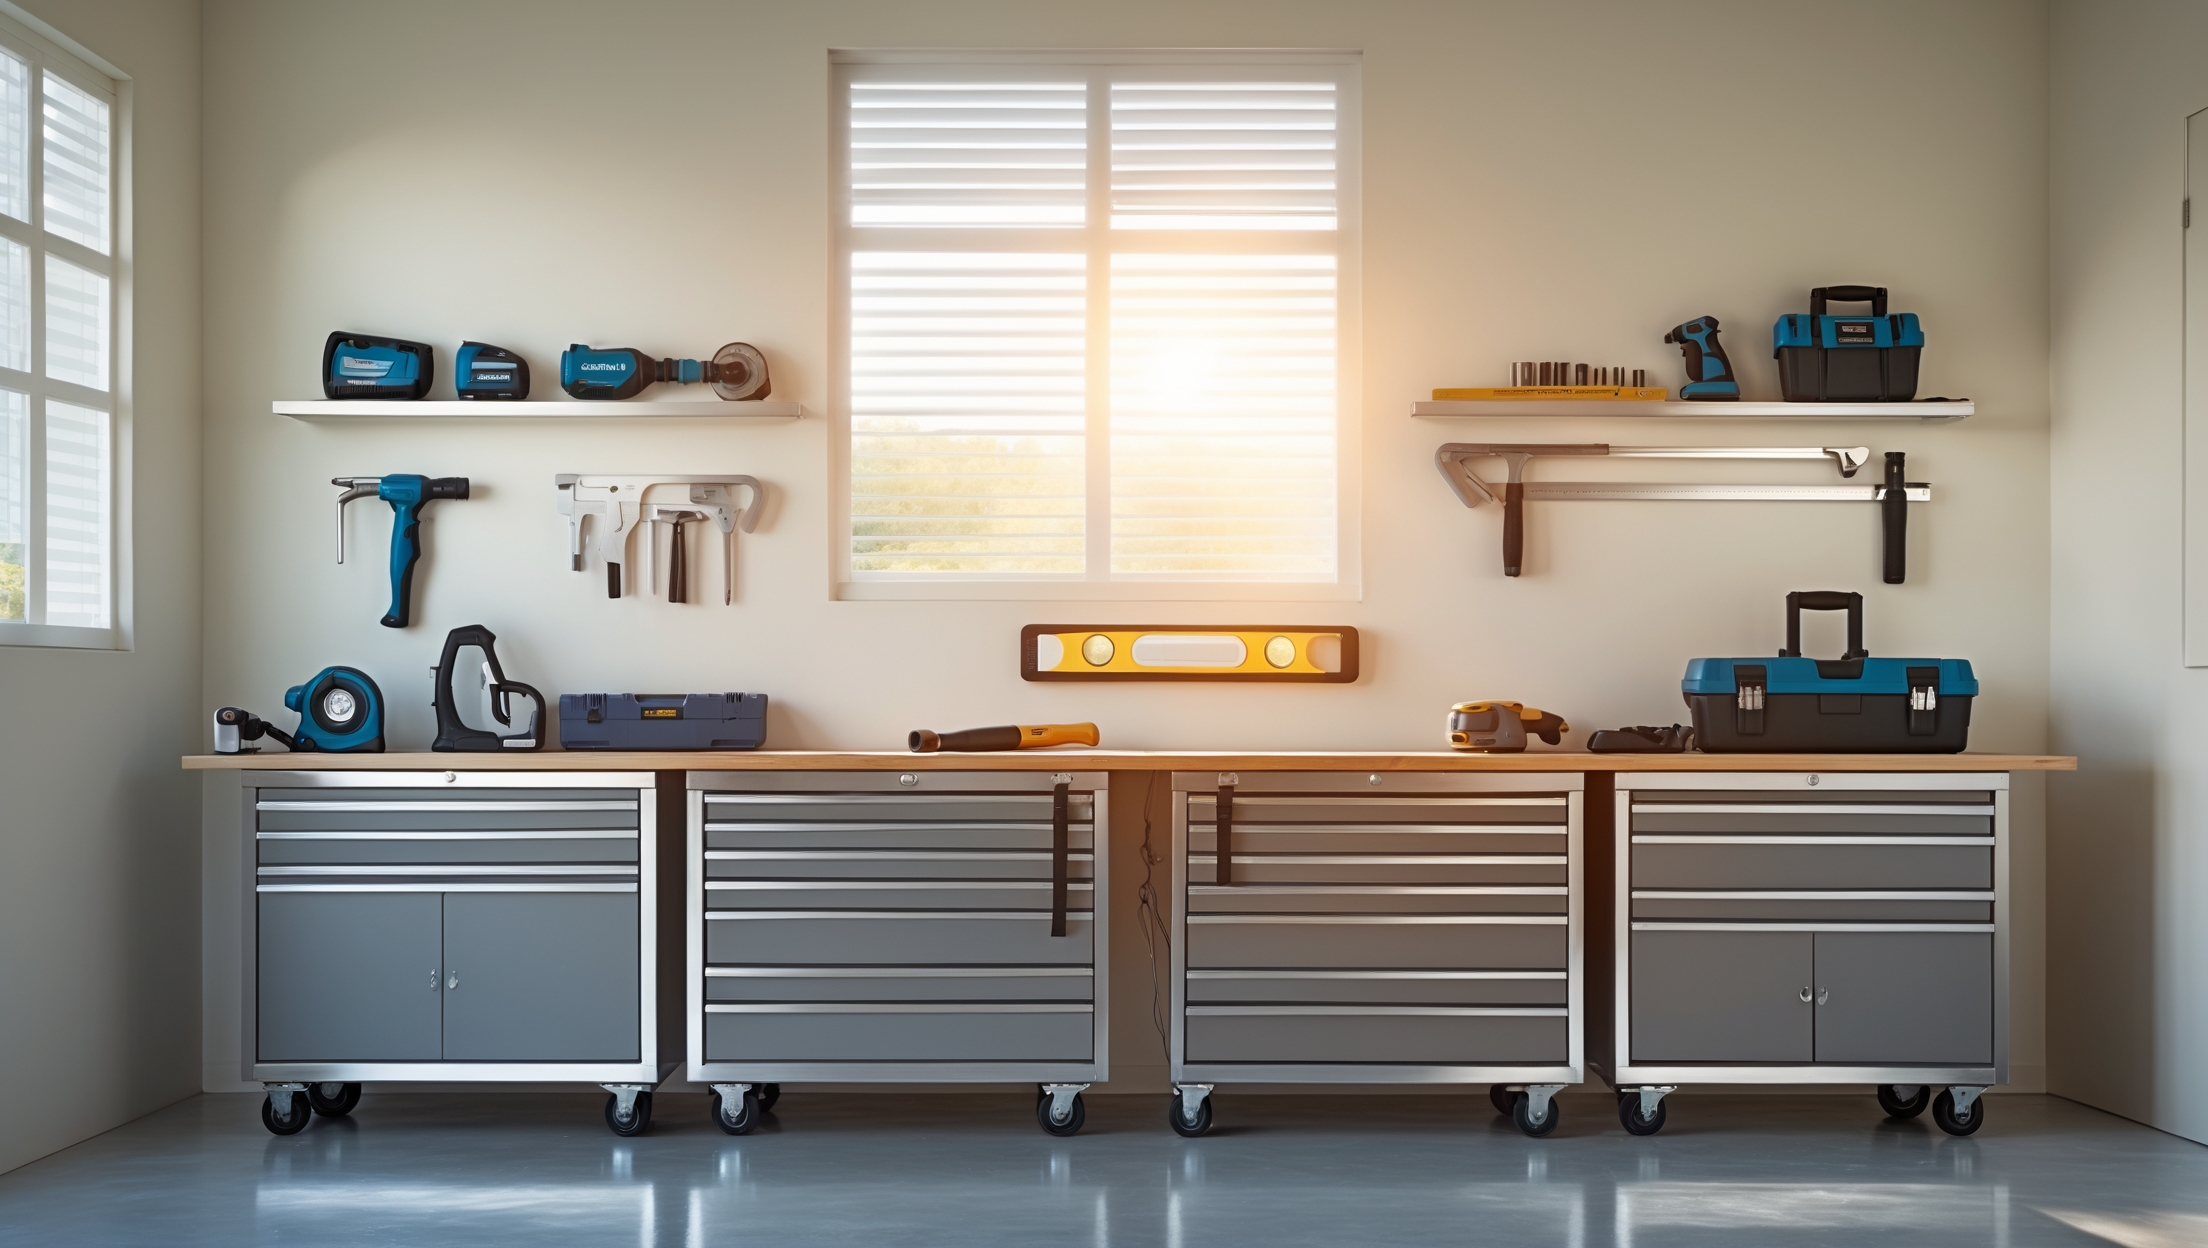
Tools & Equipment: What You’ll Need
Gathering the right tools ahead of time makes the process smoother and safer. Here’s your essential toolkit:
- Voltage tester: To confirm power is off
- Screwdrivers: Flathead and Phillips
- Wire stripper: For prepping wires
- Needle-nose pliers: For shaping and connecting wires
- Wire connectors (wire nuts): To secure connections
- Stepladder: For safe access
- Flashlight or headlamp: For visibility if power is off
- Electrical tape: For extra security (optional)
- Safety goggles and gloves: For protection
Safety Checklist: Before You Start
- Turn off the power at the breaker—never just the wall switch
- Test wires with a voltage tester to confirm they are not live
- Ensure your ladder is stable and set on a flat surface
- Keep your workspace dry and free of clutter
- Read the manufacturer’s instructions for your new fixture
Step-by-Step Tutorial: Replacing a Ceiling Light Fixture
Step 1: Prepare the Area
Clear furniture from under the fixture. Lay down a drop cloth to catch debris or screws. Set up your ladder directly below the fixture.
Step 2: Cut Power and Confirm
Locate the correct circuit breaker and switch it off. Use a non-contact voltage tester to check that all fixture wires are dead before touching anything.
Step 3: Remove the Old Fixture
- Unscrew and remove the fixture cover or globe. Set aside glass carefully.
- Support the fixture as you remove screws or mounting nuts holding it to the electrical box.
- Gently lower the fixture and locate the wire connections (typically black/hot, white/neutral, and green or bare/ground).
- Unscrew wire connectors, separate wires, and remove the old fixture entirely.
Step 4: Inspect the Electrical Box and Wiring
- Check that the electrical box is securely fastened to the ceiling joist or support bracket.
- Inspect wires for fraying, discoloration, or damage. If wires look brittle or burnt, consult an electrician.
- Verify that the box is rated to support the weight of your new fixture (especially for chandeliers or heavy pendants).
Step 5: Assemble the New Fixture
- Follow the manufacturer’s instructions to assemble the fixture on the ground if possible (attach shades, bulbs, etc.).
- Pre-thread mounting screws or hardware as directed.
Step 6: Connect the Wires
- With the fixture supported (ask for help or use a fixture hook), twist together matching wires: black to black, white to white, and ground to ground.
- Use wire connectors (wire nuts) to secure each connection. Tug gently to confirm.
- If your home’s wiring colors are different, consult the instructions or an electrician.
- Neatly tuck wires into the box without crimping or pinching.
Step 7: Mount the Fixture
- Align the fixture base or bracket with the electrical box and secure with screws or mounting nuts.
- Check that the fixture is flush and secure. Avoid overtightening, which can crack glass or mounting plates.
- Install bulbs and any shades or decorative elements.
Step 8: Restore Power and Test
- Switch the breaker back on.
- Test the fixture using the wall switch. Confirm all bulbs work and there is no flickering or buzzing.
- If the fixture doesn’t work, turn off power again and double-check all connections.
Maintenance Best Practices for New Fixtures
- Use bulbs that match the fixture’s wattage rating (never exceed the maximum marked on the socket).
- Dust fixtures and bulbs regularly to maximize light output.
- If using LED or smart bulbs, follow manufacturer guidelines for compatibility.
- Inspect occasionally for loose mounting screws or signs of heat damage.
Insurance Essentials: Are You Covered?
Most homeowner policies cover damages from accidental electrical fires, but only if the work was done to code. DIY electrical work that causes a claim may be denied if it violates local regulations or was performed unsafely. To protect yourself:
- Document your work (photos, receipts, instruction manuals)
- Keep proof of compliance with local codes
- Consider hiring a licensed electrician for complex or high-value fixture installations
Common Myths About Fixture Replacement
- Myth: “Turning off the wall switch is enough.”
Fact: Always turn off the circuit at the breaker and test wires. - Myth: “All wires are color-coded correctly.”
Fact: Older homes can have non-standard wiring; always double-check with a tester. - Myth: “You can use any bulb in any fixture.”
Fact: Exceeding wattage ratings is a fire hazard.
Conclusion: Transform Your Space—Safely and Smartly
Swapping out old light fixtures is one of the most transformative and satisfying home improvement projects you can tackle. Not only does it refresh your home’s look, but it also enhances safety, energy efficiency, and resale value. The key to a successful replacement lies in careful planning: understanding your budget, gathering the right tools, adhering to compliance codes, and above all, prioritizing safety every step of the way. Whether you’re aiming for a dramatic chandelier or a subtle flush mount, following the steps outlined in this guide will ensure a smooth, safe installation and lasting illumination. Remember, when in doubt about wiring or code requirements, don’t hesitate to consult a licensed electrician. By taking a methodical approach, you’ll enjoy your upgraded lighting with peace of mind, knowing your home is brighter—and safer—than ever before. Happy DIY-ing!
If my current fixture is buzzing and flickering, is it usually safe to assume the fixture is the problem, or should I be concerned about potential underlying wiring issues before proceeding with a replacement?
Buzzing and flickering often point to a problem with the fixture itself, such as a failing ballast or loose parts. However, faulty wiring or loose connections in the electrical box can also cause these symptoms. Before replacing the fixture, turn off the power and inspect the wiring for any signs of damage or loose connections. If you’re unsure or see anything unusual, it’s best to consult a licensed electrician for safety.
How long does a basic DIY light fixture replacement usually take, assuming someone has minimal experience? I’m trying to plan out if this is a quick weekend project or if I should leave more time.
For someone with minimal experience, a basic light fixture replacement generally takes about 30 to 60 minutes per fixture. This includes time for turning off the power, removing the old fixture, connecting the wiring, mounting the new fixture, and testing it. If you have several fixtures or run into unexpected issues, you may want to set aside a few hours or an afternoon to complete the project at a comfortable pace.
The article talks about flickering lights and buzzing sounds as reasons to replace a fixture. If I replace an old fixture myself, but those issues continue, what should I check first before calling an electrician?
If flickering or buzzing continues after replacing the fixture, first double-check that all wire connections are secure and the bulbs are correctly installed. Also, make sure you’re using bulbs of the correct type and wattage. Sometimes, issues like a faulty switch or loose wiring elsewhere in the circuit can cause these symptoms. If these basic checks don’t solve it, it’s best to contact a licensed electrician.
You said bulbs vary from $3 to $20 depending on efficiency. For someone upgrading to reduce their energy bill, which type of bulb would you recommend pairing with new fixtures to get the best long-term savings?
For the best long-term savings, I recommend choosing LED bulbs. They might cost a bit more upfront compared to other types, but they use much less electricity and last significantly longer than traditional incandescent or CFL bulbs. When upgrading your fixtures, look for LEDs with the ENERGY STAR label for maximum efficiency and reliability.
I’m curious about compliance and permit requirements when replacing old fixtures. Are there specific local codes or situations where you definitely need a permit, or does it mostly depend on whether you’re rewiring versus just replacing a similar fixture?
Compliance and permit requirements can vary by location. Generally, if you’re simply swapping out an old fixture for a new one of the same type—without altering wiring or adding circuits—permits aren’t always needed. However, if rewiring, moving fixtures, or making electrical upgrades, many areas do require permits and inspections. It’s best to check with your local building authority or city permitting office to be sure, as codes and enforcement differ from place to place.