Introduction: The Risks and Rewards of Removing a Load-Bearing Wall
Modern home design trends often favor open floor plans, with expansive, connected living spaces that maximize light and flow. One common renovation dream is to knock down a wall—especially between kitchens and living rooms—to create that sought-after openness. However, when the wall in question is load-bearing, the stakes change entirely. Removing a load-bearing wall isn’t just a cosmetic update; it’s a complex structural modification that, if mishandled, can compromise your home’s stability and safety. Before reaching for a sledgehammer, it’s critical to understand exactly what’s involved, from identifying whether a wall is load-bearing, to calculating costs, obtaining the right permits, and ensuring all safety precautions are observed. This comprehensive guide walks you through every step of the process, equipping you with the knowledge to plan, budget, and execute a safe, successful transformation—whether you’re hiring pros or working alongside them.
Understanding Load-Bearing Walls: What Makes Them Special?
What Is a Load-Bearing Wall?
A load-bearing wall is a structural element that supports the weight of your home—including the roof, upper floors, and everything above. Unlike partition (non-load-bearing) walls, which simply divide spaces, load-bearing walls are integral to your home’s stability. Removing or altering them without proper planning can lead to sagging floors, cracked ceilings, or even catastrophic collapse.
How to Identify a Load-Bearing Wall
- Check the Blueprints: Original home plans specify load-bearing walls. Look for thick, continuous lines marking structural elements.
- Wall Location: Exterior walls are almost always load-bearing. Interior walls running perpendicular to joists are often load-bearing, especially if located near the center of the house.
- Basement Clues: In unfinished basements, look for beams or columns directly beneath the wall in question—these often support load-bearing structures above.
- Attic Inspection: In the attic, see if joists rest on the wall below. If they do, it’s likely load-bearing.
- Consult a Structural Engineer: When in doubt, always bring in a pro. Incorrect identification can have disastrous consequences.
Safety First: Why Removing a Load-Bearing Wall is Not a Typical DIY Project
Structural Risks
Removing a load-bearing wall without adequate support can lead to immediate or gradual structural failure. The most common issues include bowing floors, cracked drywall, sticky windows and doors, or—at worst—partial collapse. Even a minor error can have far-reaching consequences.
Building Codes and Permits
- Permits Are Mandatory: Structural work always requires permits. Skipping this step can void your homeowners insurance, cause legal trouble, and hamper future sales.
- Inspections Ensure Safety: Building inspectors check that new supports and beams meet code and are installed correctly. This protects you and future occupants.
Cost Breakdown: What to Budget for Removing a Load-Bearing Wall
Typical Price Ranges
The average cost to remove a load-bearing wall in a single-family home ranges from $2,000 to $10,000 or more. The wide range reflects variables such as wall length, materials, accessibility, and whether you’ll need to reroute utilities.
Core Cost Factors
- Structural Engineer Fees: $500–$2,000. A professional assessment is non-negotiable.
- Permits: $200–$1,000 depending on your jurisdiction.
- Labor: $1,500–$6,000, varying by region and project complexity.
- Materials (Beams, Columns, Hardware): $500–$3,000. Steel beams are pricier than wood (LVL or Glulam), but sometimes required.
- Utility Relocation: $500–$2,500 for electrical, plumbing, or HVAC lines concealed in the wall.
- Finishing Work: $500–$2,000 for drywall, paint, trim, and flooring repairs.
Hidden and Unexpected Costs
- Hazardous Materials: Older homes may have asbestos or lead paint, requiring professional abatement.
- Structural Surprises: Discovering sagging joists, undersized beams, or inadequate foundations can add thousands to your project.
- Temporary Living Arrangements: If the work area is central to your home, you may need to relocate during demolition.
Step-by-Step Preparation: From Planning to Demo Day
Step 1: Hire a Structural Engineer
Start with a professional assessment. The engineer will inspect your home, determine if the wall is load-bearing, specify the correct size and type of replacement beam, and provide stamped drawings for permits and contractors.
Step 2: Obtain Permits
- Submit Plans: File your engineer’s drawings with the local building department.
- Schedule Inspections: Plan for multiple inspections—before, during, and after the wall is removed.
Step 3: Select Your Contractor
- Experience Matters: Choose a contractor with specific experience in structural modifications, not just general renovations.
- Check References: Verify previous similar projects and ensure proper insurance and licensing.
Step 4: Plan for Utility Relocation
Load-bearing walls often conceal electrical wiring, plumbing, or HVAC ducts. Work with licensed electricians and plumbers to plan safe rerouting. This step may require wall and floor access in adjacent rooms.
Step 5: Prepare the Area
- Clear the Space: Remove furniture, decor, and valuables from the work zone.
- Protect Surfaces: Lay down drop cloths and plastic sheeting to contain dust and debris.
- Seal Off Adjacent Rooms: Use zip walls or heavy plastic to isolate the demolition area from the rest of your home.
- Plan for Noise and Vibration: Demolition is loud—warn neighbors and minimize disruption where possible.
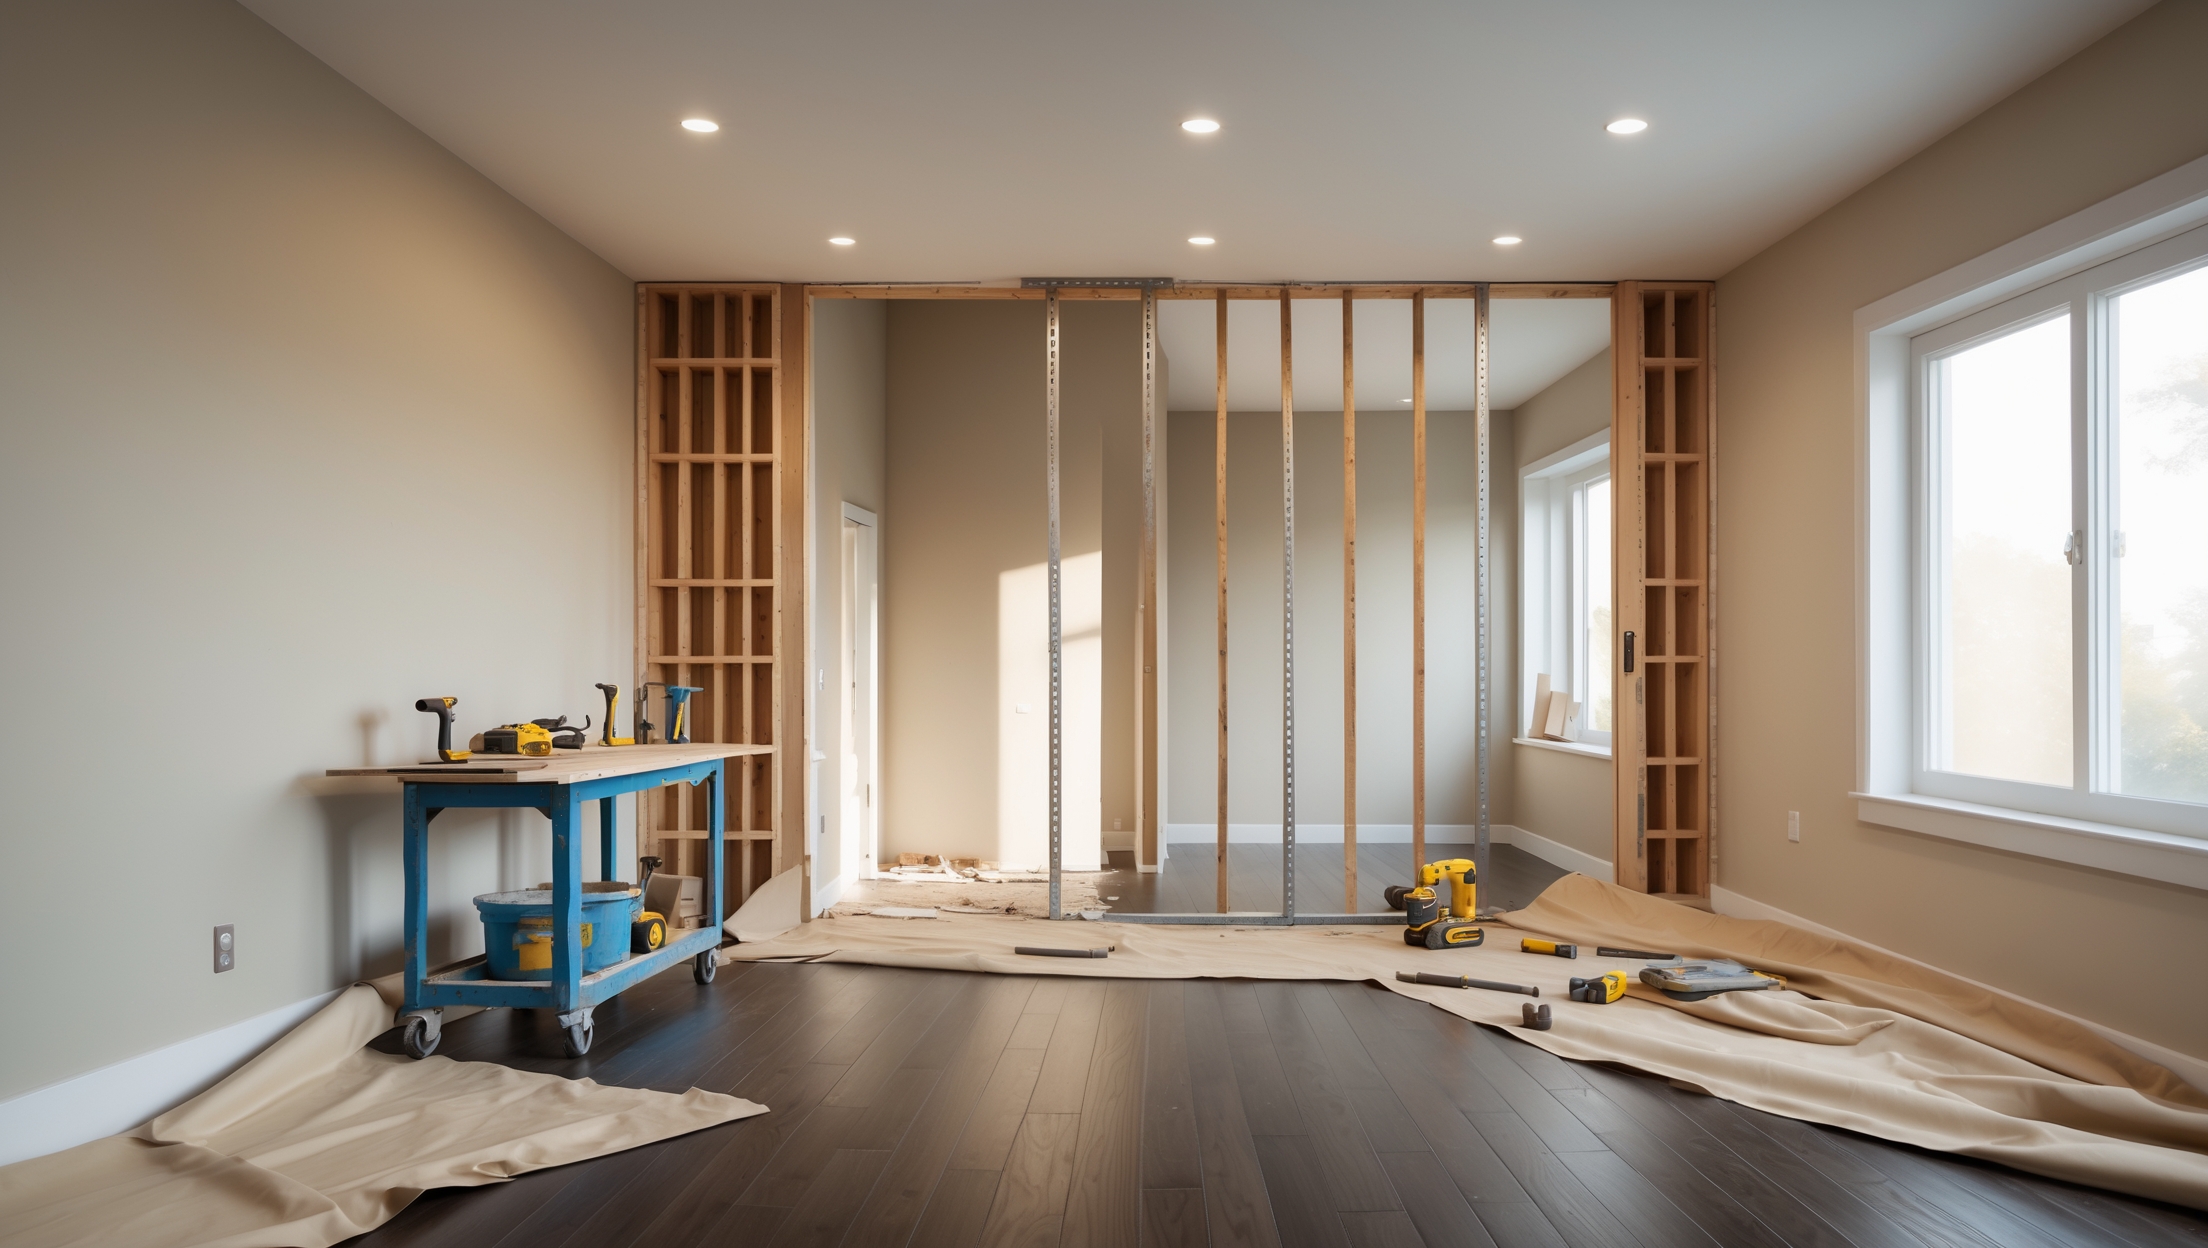
Demolition and Structural Support: How the Pros Do It
Step 6: Install Temporary Supports
Before removing any part of a load-bearing wall, contractors build temporary support walls (often called “shoring”) on either side of the demo area. These support the load above while the original wall is removed and the new beam is installed.
Step 7: Remove the Wall
- Demo in Stages: Carefully remove drywall, then studs, checking for hidden utilities at each stage.
- Dispose of Debris Properly: Arrange for a dumpster or haul away service for construction waste.
Step 8: Install the New Beam
- Beam Selection: Based on your engineer’s plans, the beam may be steel, LVL, or Glulam.
- Column Placement: End columns must rest on suitable footings or foundation walls. Sometimes, additional subfloor reinforcement is needed.
- Secure Connections: Use approved hardware and fasteners to tie the new beam and posts into existing framing.
Step 9: Final Inspections
Once the beam is in place, an inspector will verify that all work meets code and matches the engineer’s drawings. Only after passing inspection can you proceed with cosmetic repairs.
Post-Removal: Repairs, Finishing, and Maintenance
Repairing and Blending the Ceiling and Floor
- Drywall and Paint: Patch and paint the new beam enclosure and any affected adjoining walls.
- Flooring: Install new boards, tiles, or carpet to bridge the gap left by the removed wall.
- Trim and Molding: Repair or replace baseboards and crown molding for a seamless look.
Ongoing Maintenance
Monitor for any signs of settling or shifting, such as new cracks or doors that no longer close smoothly. Schedule a follow-up inspection if any issues arise. Keep records of all permits, engineering documents, and inspections for future reference and resale value.
Common Mistakes to Avoid
- Skipping the Engineer: Never attempt to size or install a structural beam without a licensed professional’s input.
- Ignoring Permits: Unpermitted structural work can void your insurance, reduce your home’s value, and cause legal headaches.
- Improper Temporary Supports: Inadequate shoring can cause sudden collapse during demolition.
- Overlooking Hidden Utilities: Rushing demolition can result in damaged wiring or plumbing, leading to expensive repairs and safety risks.
- Underestimating Finishing Costs: Budget for all the cosmetic fixes needed to make the space look seamless.
DIY vs. Professional: When (and Why) to Call in the Experts
While many home improvement projects are DIY-friendly, removing a load-bearing wall is not typically one of them. Even experienced DIYers should defer to professionals for engineering, permitting, and structural work. However, you can manage some prep work—such as clearing the area, painting, or finishing trim—yourself to save on costs. When in doubt, err on the side of caution and work with licensed, insured pros.
Conclusion: Transform Your Space Safely and Successfully
Opening up your floor plan by removing a load-bearing wall can be one of the most dramatic, rewarding changes you make to your home. It’s a renovation that delivers both visual impact and functional improvement, creating a more spacious, light-filled environment. Yet it’s not a project to undertake lightly—structural modifications demand careful planning, skilled execution, and respect for local codes and safety practices. By investing in a structural engineer’s expertise, securing the proper permits, and working with experienced contractors, you’ll minimize risk and avoid costly mistakes. Budget carefully, plan for contingencies, and never cut corners on temporary supports or safety gear.
Remember: the strongest renovations are those you can enjoy with confidence, knowing your home’s integrity remains intact. With the right approach, you’ll not only gain a stunning, open-concept living space but also protect your investment for years to come. If you’re ready to take the next step, consult with a structural engineer or reputable contractor to begin the process—and enjoy the transformation with peace of mind.