Introduction: Why Refinish Your Hardwood Floors?
Hardwood floors are a timeless feature, adding warmth and character to any home. However, years of foot traffic, furniture movement, and daily wear can leave them looking dull, scratched, or worn out. Professional refinishing can restore their natural beauty, prolong their lifespan, and even boost your property’s value. Many homeowners consider refinishing a daunting task reserved for experts, but with the right guidance, tools, and a realistic budget, it is absolutely achievable as a DIY project. This comprehensive guide will walk you through every stage of refinishing hardwood floors—outlining necessary tools, accurate cost breakdowns, thorough step-by-step instructions, vital safety tips, and practical maintenance advice. Whether you’re tackling a small bedroom or your entire ground floor, these expert insights will help ensure a successful, stress-free transformation with results you’ll be proud of for years to come.
Understanding the Refinishing Process
What is Floor Refinishing?
Refinishing hardwood floors involves sanding away the top layer of the wood to remove surface imperfections, then applying a new protective finish. This process can erase scratches, stains, and discoloration, while restoring the wood’s luster and safeguarding it from future damage.
When Should You Refinish?
- Visible Scratches or Dullness: Obvious wear, deep scratches, or gray patches indicate the finish is worn away.
- Stains or Water Damage: Dark spots or stains that cleaning can’t remove are signs the wood needs attention.
- Finish Fails Water Test: Drip a few drops of water onto the floor; if it soaks in rather than beads up, the finish is compromised.
Budgeting for a DIY Hardwood Floor Refinish
Key Cost Factors
Refinishing is more affordable than replacing floors, but costs can add up. Here’s what you can expect:
- Room Size: Most costs are calculated by square footage. Larger spaces require more materials and time.
- Equipment Rental: Sanders and edge tools are typically rented by the day.
- Materials: Sandpaper, wood filler, stain, finish, and cleaning supplies.
- Protective Gear: Respirators, goggles, and gloves are essential for safety.
- Prep and Cleanup: Plastic sheeting, painter’s tape, and cleanup tools add to expenses.
Average Cost Breakdown (Per 200 Sq. Ft. Room)
- Sander Rental: $50–$80 per day
- Edger Rental: $30–$50 per day
- Sandpaper (various grits): $30–$50
- Wood Filler: $10–$20
- Stain (optional): $20–$40
- Polyurethane Finish: $40–$70
- Protective Gear: $20–$40
- Misc. Supplies (tape, plastic, cleaning): $20–$40
Total Estimated DIY Cost: $200–$350 per average-sized room (compared to $800–$1,200 for professional services).
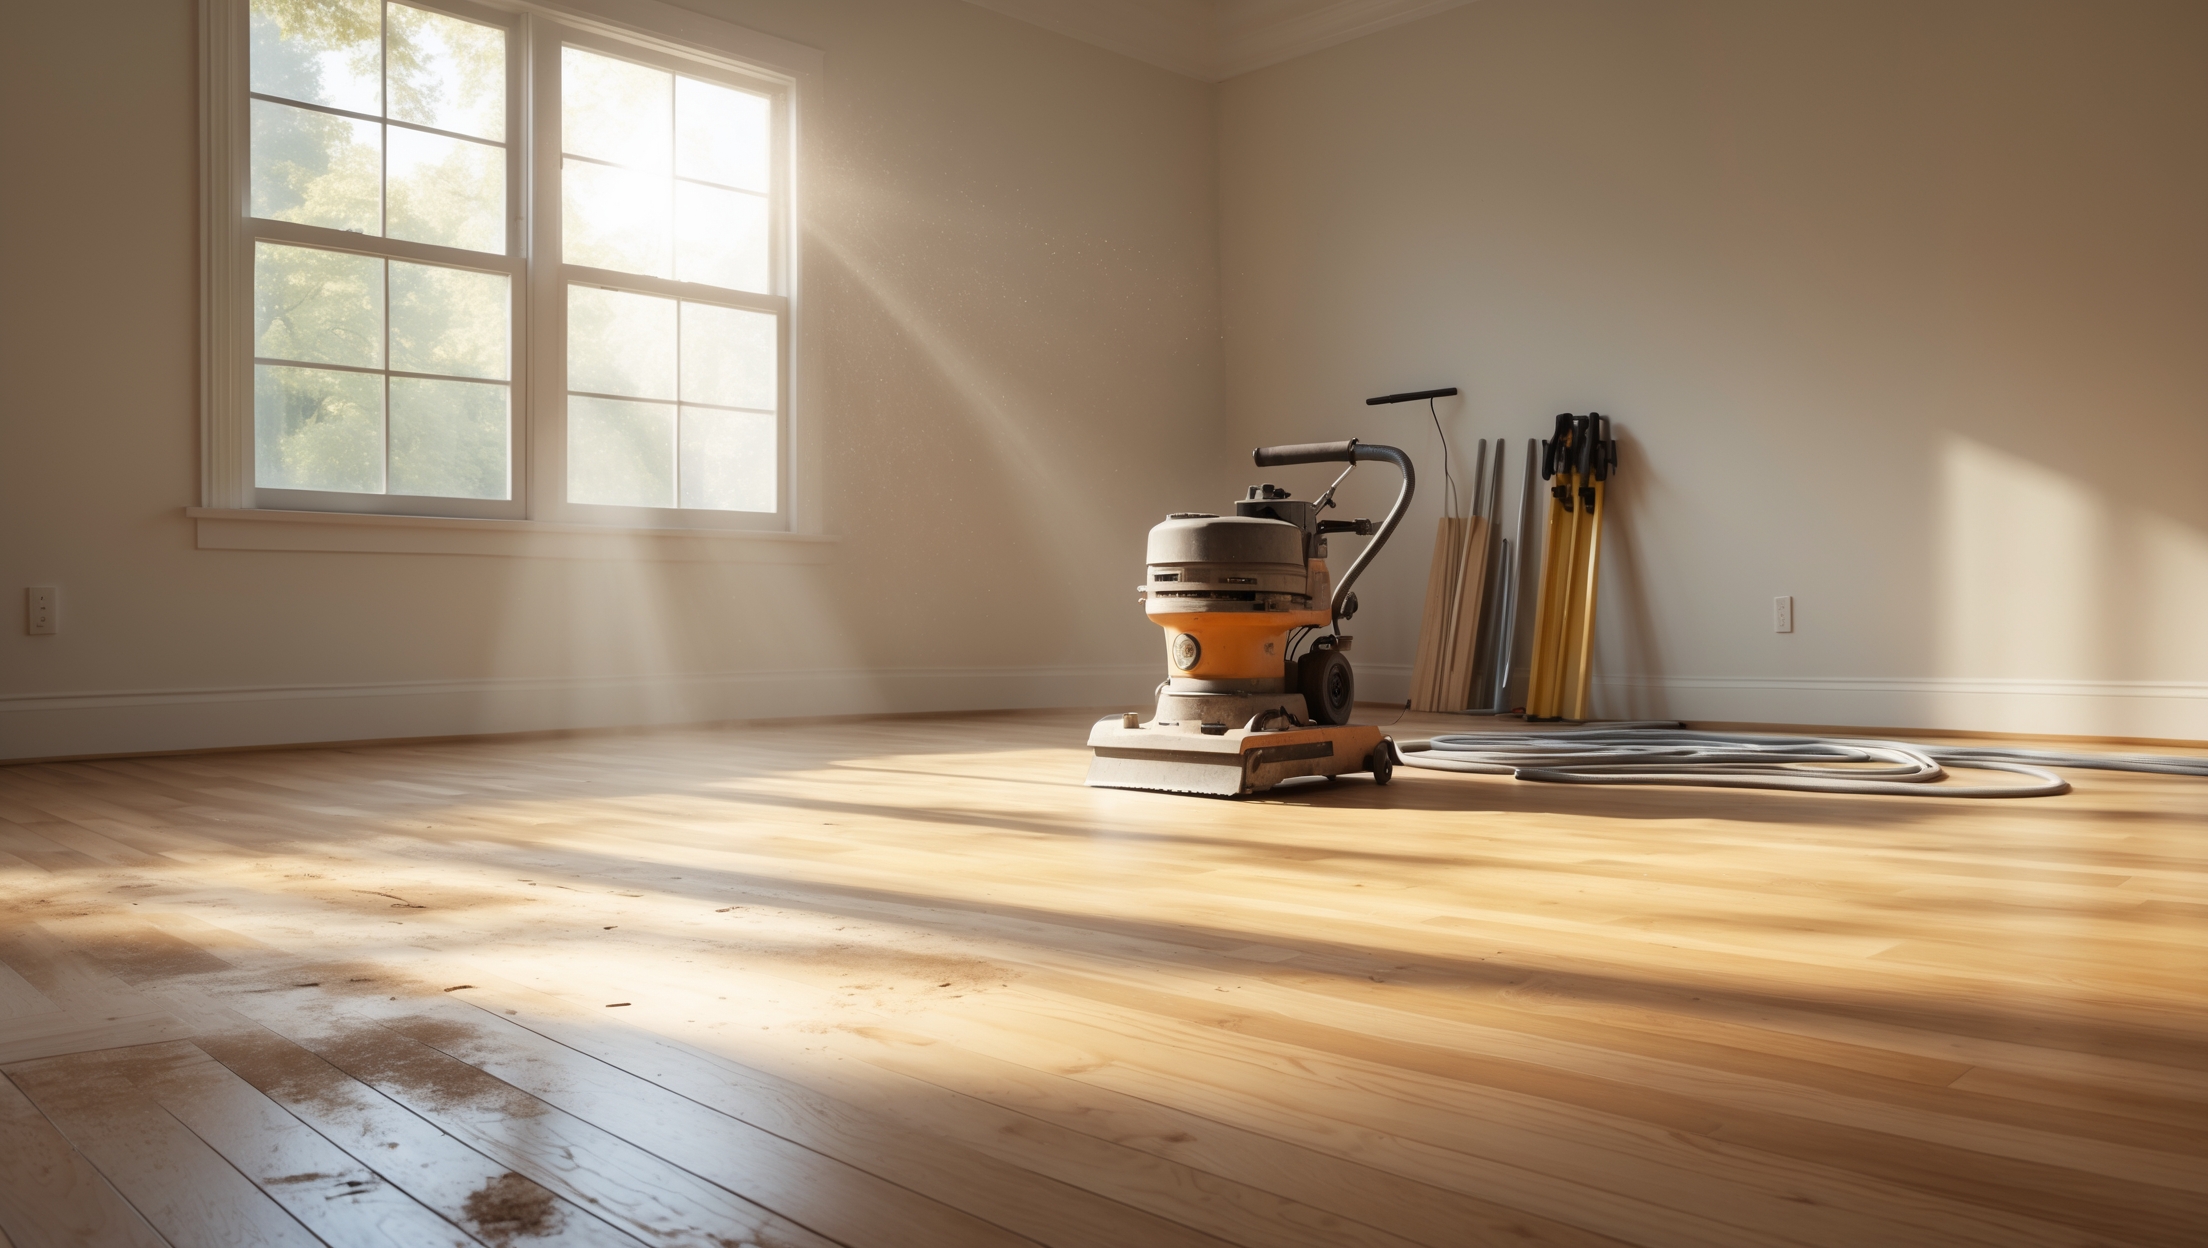
Essential Tools & Equipment
Must-Have Tools
- Drum or Orbital Floor Sander: For sanding large areas evenly.
- Edge Sander: To reach corners and room perimeters.
- Shop Vacuum: For dust removal between sanding passes.
- Putty Knife: For filling cracks and nail holes.
- Applicators: Lambswool or synthetic pads for finish; brushes for corners.
- Protective Gear: Respirator mask, safety goggles, ear protection, gloves.
Optional but Useful
- Hand Scraper: For tight corners or stubborn old finish.
- Microfiber Mop: For dusting between steps.
- Floor Buffer: For between-coat abrasion or final polishing.
Preparation: Setting Up for Success
Clear and Protect the Space
Remove all furniture, rugs, and wall hangings. Take down curtains to prevent dust accumulation. Seal off doorways, vents, and adjacent rooms with plastic sheeting and painter’s tape to contain dust.
Inspect and Repair the Floor
- Nail Down Loose Boards: Hammer or screw down any squeaky or moving boards.
- Remove Old Nails or Staples: Extract any protruding fasteners to prevent sander damage.
- Fill Cracks and Holes: Use wood filler for gaps, dents, or nail holes. Let it dry completely before sanding.
Gather Safety Gear
Wear a NIOSH-approved respirator, safety goggles, and ear protection. Sanding generates fine dust and loud noise; proper gear is non-negotiable for health and comfort.
Step-by-Step Floor Refinishing Process
1. Sanding the Floor
- Begin with Coarse Grit: Start with 36- or 40-grit sandpaper to strip old finish and level the surface. Move the sander in the direction of the wood grain when possible.
- Edge Sanding: Use an edge sander to reach corners and along walls. Overlap with the main sanding area for a smooth transition.
- Progress Through Finer Grits: Switch to 60-, then 100-grit papers for subsequent passes. Vacuum thoroughly between each grit change.
- Final Hand Sanding: Sand corners and tight spots by hand or with a detail sander.
2. Cleaning Up Dust
- Vacuum: Use a shop vacuum on the floor, baseboards, and ledges.
- Tack Cloth: Wipe the entire floor with a damp (not wet) microfiber cloth or tack cloth to pick up remaining dust.
3. Staining (Optional)
- Test Colors: Try your chosen stain on a small, inconspicuous area to confirm the shade.
- Apply Evenly: Use a brush or applicator pad, working in small sections along the grain. Wipe excess quickly for uniform color.
- Allow Proper Drying: Follow manufacturer’s instructions—usually 8–24 hours.
4. Applying the Finish
- Choose a Finish: Polyurethane is most popular (available in water- or oil-based types). Water-based dries faster and has less odor; oil-based is more durable and amber-toned.
- Application: Pour finish into a paint tray. Use a lambswool or synthetic applicator, moving with the grain in smooth, even strokes. Maintain a wet edge to avoid lap marks.
- Dry and Recoat: Let each coat dry as directed (water-based: 2–4 hours; oil-based: 8–12 hours). Lightly sand with fine (220-grit) paper between coats for a smooth result. Vacuum and wipe dust before recoating.
- Apply 2–3 coats for durability.
5. Curing and Cleanup
- Allow Full Cure: Wait at least 24 hours before light foot traffic; 72 hours before moving furniture back; 7 days for full cure before laying rugs.
- Dispose Safely: Oil-soaked rags can self-ignite. Lay them flat to dry outdoors before disposal, or follow local hazardous waste guidelines.
Safety Checklist
- Wear a respirator, goggles, and hearing protection at all times during sanding and finishing.
- Ensure good ventilation—open windows and use fans, but avoid drafts that stir up dust.
- Keep children and pets out of the work area until all processes are complete and surfaces are dry.
- Unplug equipment before changing sandpaper or cleaning.
- Follow manufacturer instructions for all products and tools.
- Store chemicals and finishes out of direct sunlight and away from heat sources.
- Handle and dispose of rags and solvents safely to prevent fire risk.
Common DIY Mistakes and How to Prevent Them
- Skipping Grits: Not progressing through sanding grits leads to uneven finish and visible scratches. Always follow a coarse-to-fine sequence.
- Over-Sanding in One Spot: This can create low spots or divots. Keep the sander moving at a steady pace.
- Poor Dust Control: Dust left behind can ruin the smoothness of the finish. Vacuum and tack between every step.
- Applying Finish Too Thickly: Thick coats take longer to dry and can wrinkle or bubble. Thin, even coats are key.
- Rushing Recoat Times: Not allowing adequate drying between coats can cause tacky floors and poor adhesion.
Maintenance Best Practices for Refinished Hardwood Floors
Immediate Aftercare
- Wait at least 7 days before placing area rugs to allow finish to cure fully.
- Install felt pads on furniture feet before moving them back in.
- Keep shoes—especially high heels—off the floors for the first week.
Ongoing Maintenance
- Use a microfiber dust mop or vacuum with a hardwood floor attachment regularly.
- Wipe up spills promptly to prevent water damage.
- Avoid harsh cleaners—use pH-neutral products designed for hardwood.
- Refresh protective pads periodically and trim pet nails to avoid scratches.
- Maintain stable indoor humidity (35–55%) to prevent wood movement.
When to Call a Professional
Not all floors are suitable for DIY refinishing. Call a professional if you encounter:
- Severely Damaged or Thin Floors: If the wood has been sanded multiple times or has deep gouges, a pro can assess if refinishing is safe.
- Exotic Woods or Parquet Patterns: These may require specialized techniques.
- Asbestos-Containing Adhesives: Found under old flooring layers—never disturb without professional testing and remediation.
Conclusion: Lasting Beauty with DIY Confidence
Refinishing hardwood floors is a rewarding project that can dramatically refresh your living space, increase your home’s value, and give you a sense of accomplishment. While the process is labor-intensive, careful planning, the right equipment, and attention to detail make it entirely manageable for most DIYers. By following the steps outlined in this guide—preparing your space, budgeting realistically, using the correct tools, and adhering to safety protocols—you can achieve professional-quality results without the hefty price tag. Remember, your floors will need ongoing care: keep them clean, control humidity, and address minor issues promptly. Occasional touch-ups and proper maintenance will keep your hardwood shining for decades. Don’t let intimidation hold you back; with patience and preparation, you’ll transform worn wood into a showpiece that anchors your home’s style and comfort. Happy refinishing!


Could you clarify if the step-by-step instructions cover both solid hardwood and engineered hardwood floors? I’m particularly interested in knowing whether the refinishing process differs significantly between the two types.
The step-by-step instructions in the article mainly focus on refinishing solid hardwood floors, as these can usually withstand sanding and full refinishing. Engineered hardwood can sometimes be refinished, but only if the top veneer layer is thick enough. The process may differ, especially in how much sanding you can safely do. Always check your engineered floor’s specifications before proceeding.