Introduction: Why Safety Is Non-Negotiable in DIY Kitchen Renovations
Undertaking a DIY kitchen renovation is one of the most rewarding home improvement projects. It promises both aesthetic transformation and increased home value. However, kitchens are unique spaces packed with potential hazards: electrical wiring, plumbing, sharp tools, and flammable materials are all commonplace. While the thrill of hands-on work is undeniable, it’s all too easy to overlook crucial safety steps in the rush to get started. Even seasoned DIYers can make costly mistakes in the kitchen, where errors can jeopardize health, finances, and even your home’s insurance compliance.
This expert safety checklist is designed for homeowners and renovators who want to approach their kitchen projects with confidence and caution. We’ll cover everything from selecting the right personal protective equipment (PPE) to identifying hidden hazards, understanding necessary permits, and applying best practices for tool use. Whether you’re painting cabinets, replacing countertops, or rewiring lighting, this guide will help you create a safe, efficient, and compliant renovation plan—minimizing risks and maximizing results.
Section 1: Pre-Renovation Preparation
1.1 Inspect and Assess the Work Area
Begin with a thorough walk-through of your kitchen. Look for signs of water damage, mold, exposed wiring, and structural issues. Document any concerns and photograph problem areas for reference during the project. Pay attention to:
- Electrical outlets and switches: Are any loose, scorched, or outdated?
- Plumbing connections: Check under sinks and behind appliances for leaks or corrosion.
- Ventilation: Ensure proper airflow to avoid buildup of dust and fumes.
- Asbestos and lead paint: Homes built before 1980 may contain hazardous materials. If in doubt, schedule professional testing.
1.2 Clear and Secure the Space
Remove all unnecessary items from your kitchen. Box up food, cookware, and utensils. Cover floors and nearby furniture with drop cloths or plastic sheeting. Create a clear, unobstructed path for moving tools and materials. If possible, set up a temporary kitchenette elsewhere in your home to avoid working around daily routines.
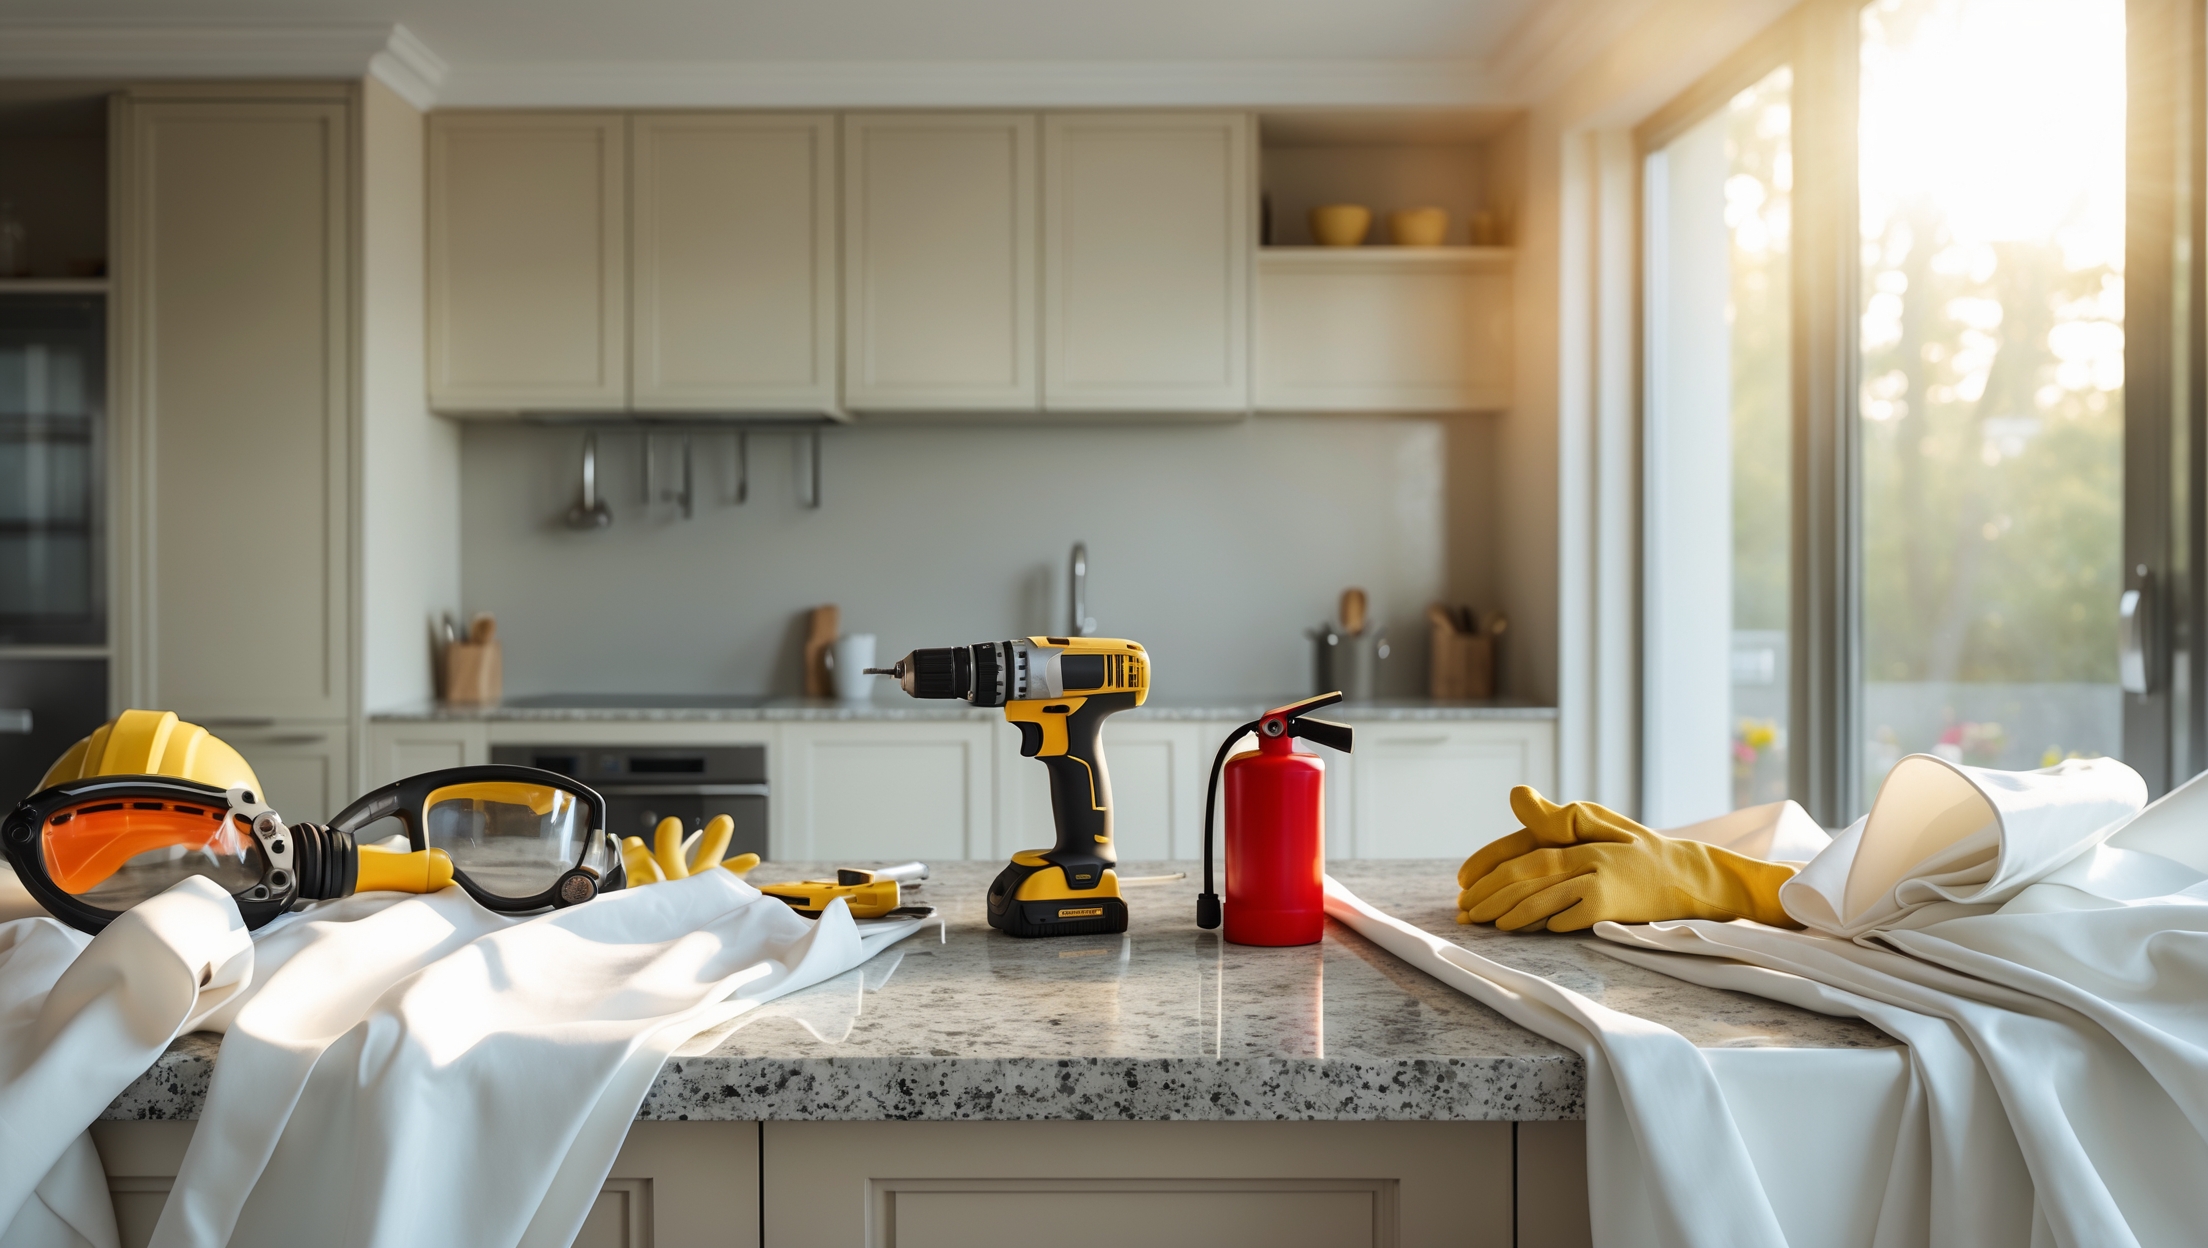
Section 2: Personal Protective Equipment (PPE) Essentials
2.1 Eye and Face Protection
Flying debris, splashes, and dust are common kitchen renovation hazards. Invest in ANSI-rated safety goggles or glasses. Use a face shield for tasks like grinding, sanding, or demolition. Always wear eye protection when operating power tools, even for quick tasks.
2.2 Respiratory Safety
Dust, fumes from paints or adhesives, and potential mold spores make respiratory protection crucial. Use NIOSH-approved N95 respirators for basic dust. For stronger fumes, opt for a half-face or full-face respirator with appropriate filters. Replace filters as recommended by the manufacturer.
2.3 Gloves and Hand Protection
- Cut-resistant gloves: Essential for handling glass, metal, and power tools.
- Nitrile or latex gloves: For painting, staining, or working with chemicals.
- Heavy-duty work gloves: For demolition and handling rough materials.
2.4 Footwear and Clothing
Wear closed-toe, slip-resistant shoes or boots. Steel-toed options are best for heavy demolition. Avoid loose clothing and tie back long hair to prevent entanglement in tools. Opt for long sleeves and pants to protect skin from splashes and scrapes.
2.5 Hearing Protection
Power tools such as saws, drills, and sanders can exceed safe noise levels. Use foam ear plugs or noise-canceling earmuffs rated for at least 85 dB reduction.
Section 3: Essential Tools and Safe Handling Practices
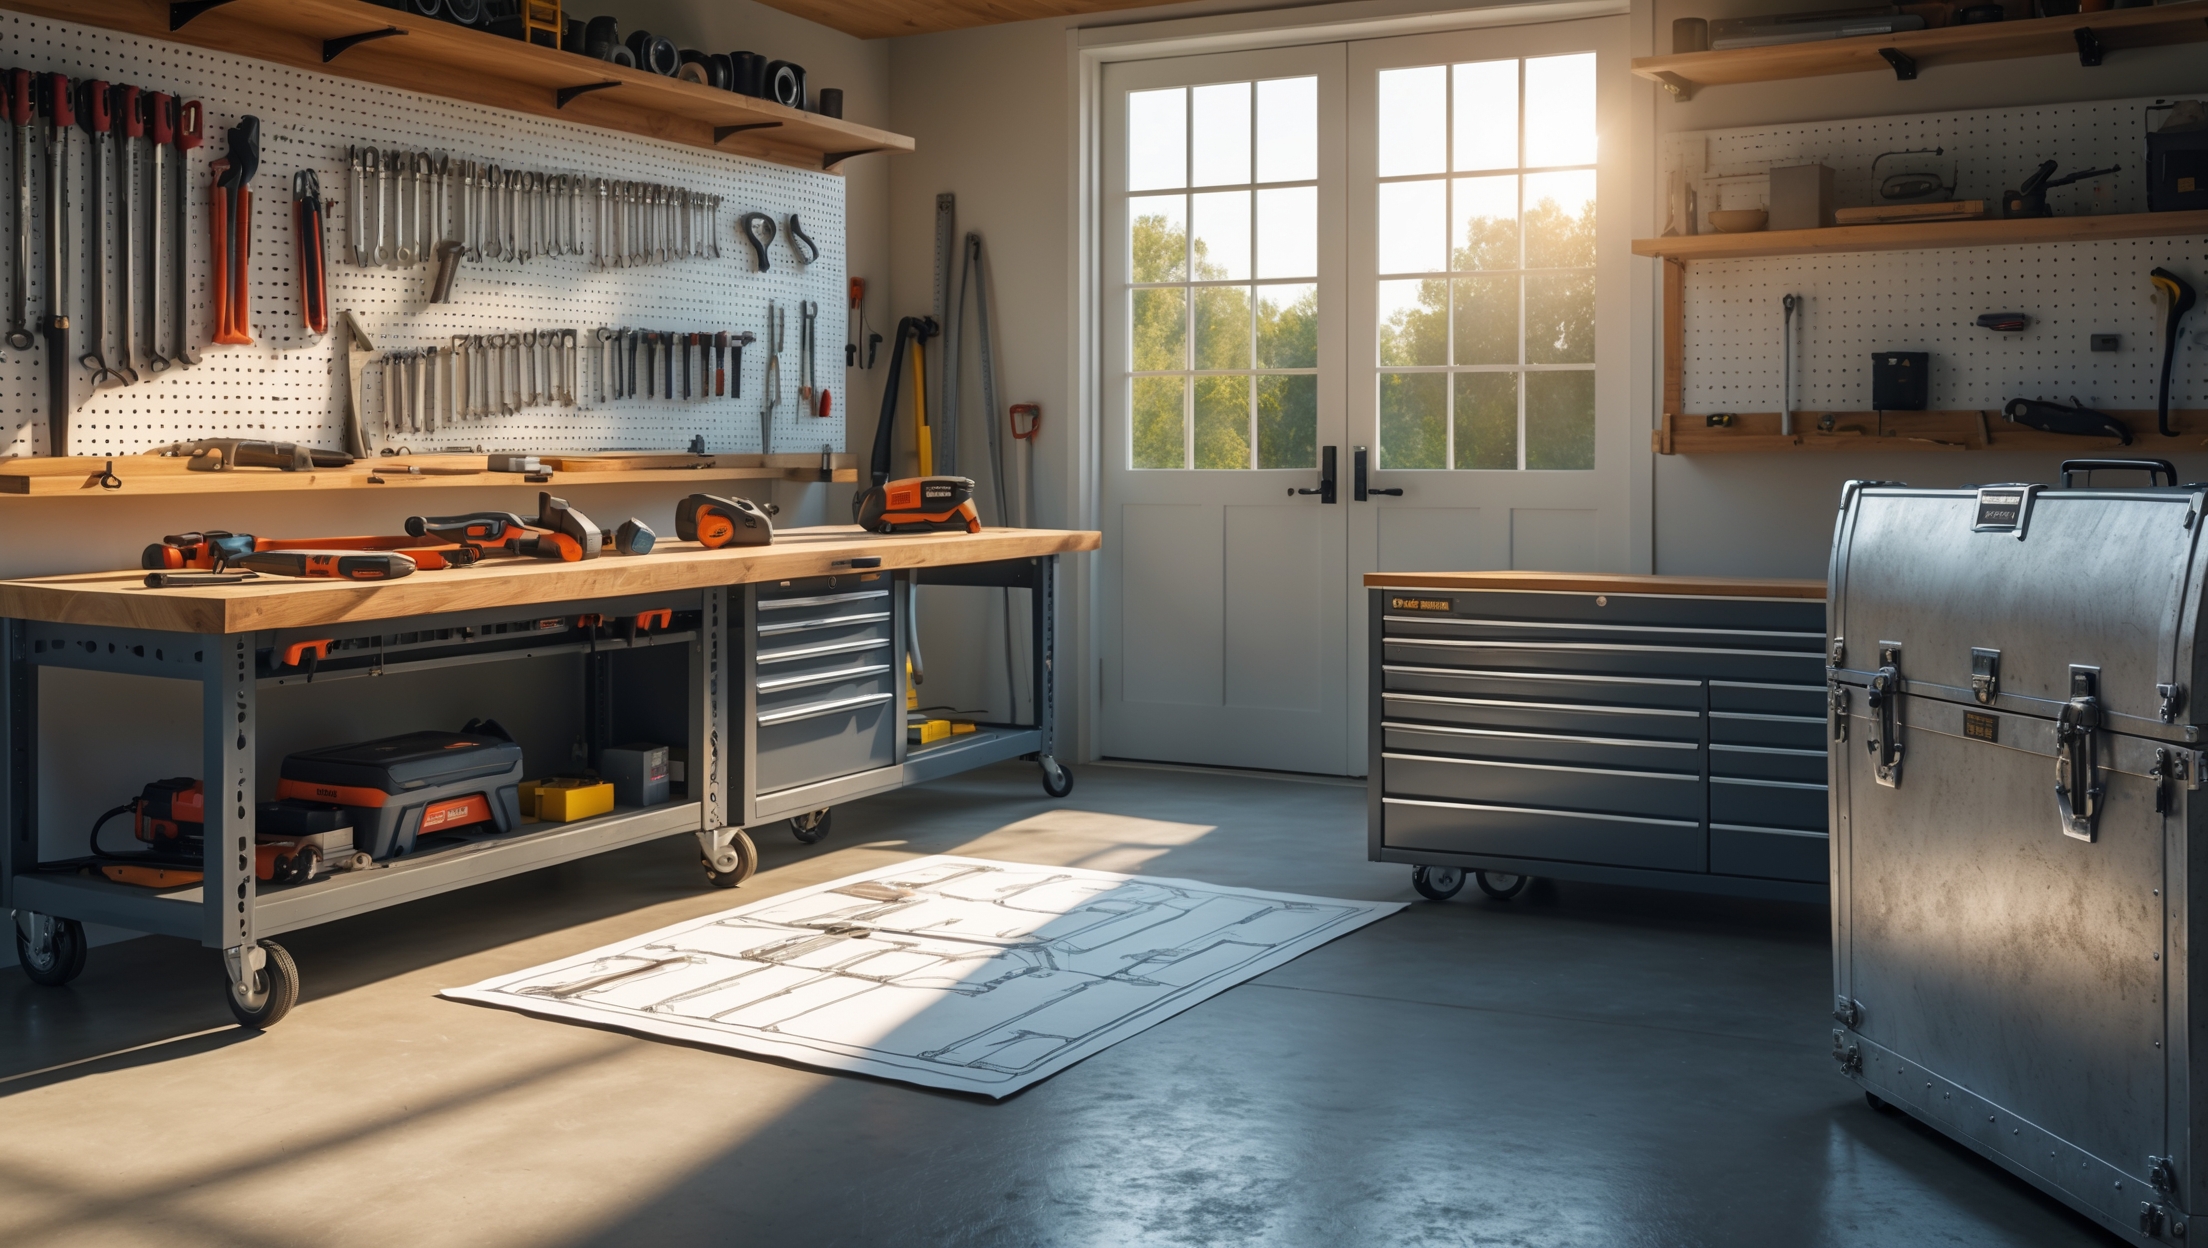
3.1 Must-Have Tools for Safe Kitchen Renovations
- Cordless drill/driver: Versatile for assembling cabinets and fixtures.
- Circular or jigsaw: For cutting countertops and panels—choose models with blade guards and safety switches.
- Stud finder: Prevents accidental damage to wiring and plumbing.
- Utility knife: For precise trimming; always retract blade when not in use.
- Voltage tester: Confirms circuits are de-energized before electrical work.
- Wet/dry vacuum: Keeps workspace free of dust and debris.
- Adjustable wrench and pliers: For safe plumbing disassembly and connections.
- Fire extinguisher (Class ABC): Within reach at all times.
3.2 Power Tool Safety Protocols
- Read all manufacturer instructions before use. Register new tools for warranty and safety updates.
- Inspect cords for fraying or damage. Use GFCI outlets in wet areas.
- Unplug tools before changing blades or bits. Never disable safety guards.
- Store sharp tools and blades out of reach, especially if children are present.
- Keep hands, hair, and clothing away from moving parts.
3.3 Safe Handling of Hazardous Materials
- Store paints, solvents, and adhesives in original containers, away from heat sources.
- Dispose of rags soaked with flammable substances in metal containers; never in household trash.
- Follow local hazardous waste disposal guidelines.
Section 4: Identifying and Managing Kitchen Hazards
4.1 Electrical Dangers
Kitchen renovations often involve working around or altering electrical circuits. Always turn off power at the breaker panel before starting. Use a voltage tester to confirm circuits are off. Mark and label wires clearly during disassembly. If your project requires rerouting, adding, or upgrading circuits, consult a licensed electrician—DIY electrical work is highly regulated and can void insurance if not compliant.
4.2 Plumbing Risks
Shutting off water at the main valve is essential before disconnecting sinks, dishwashers, or refrigerators. Keep towels and a bucket handy for residual water spills. Use two wrenches on fittings to prevent twisting pipes. If you discover old galvanized or lead pipes, plan for professional replacement to avoid contamination.
4.3 Fire Hazards
Renovations often introduce ignition sources. Avoid open flames near volatile chemicals. Never overload electrical outlets with multiple tools. Maintain a clear path to exits and keep a fire extinguisher within arm’s reach throughout the project.
4.4 Mold and Asbestos
If you discover black mold or suspect asbestos in insulation, flooring, or wall panels, stop work immediately. Seal off the area and contact certified remediation professionals. Attempting to remove these hazards without training and equipment is extremely dangerous and may violate local laws.
Section 5: Compliance and Permitting Essentials
5.1 Research Local Codes and Permit Requirements
Most kitchen renovations involving structural, electrical, or plumbing changes require permits. Check with your municipal building department before starting. Common permit triggers include:
- Relocating or adding electrical outlets
- Major plumbing modifications (moving sinks, dishwashers, etc.)
- Removing or altering load-bearing walls
Failure to secure permits can result in fines, delays, or forced removal of non-compliant work. It can also affect future home sales and insurance coverage.
5.2 Scheduling Inspections
Permitted work usually requires one or more inspections. Schedule inspections after rough-ins (behind walls) and before closing up walls or cabinets. Keep all permit documents and inspection records until the project is complete and signed off.
5.3 Insurance Notifications
Contact your homeowner’s insurance provider before starting major renovations. Some policies require notification or may limit coverage for self-performed work. Ask about coverage for accidental damage, fire, and third-party injury during your project.
Section 6: Safe Demolition and Construction Practices
6.1 Controlled Demolition
- Start with upper cabinets and work downwards to avoid falling debris.
- Use prybars and hammers carefully to minimize damage to walls and floors.
- Bag and dispose of debris daily—keep pathways clear.
- Watch for hidden electrical or plumbing lines behind walls and under floors.
6.2 Material Handling and Storage
- Store materials flat and off the floor to prevent warping and water damage.
- Stack heavy items on bottom shelves or directly on the floor.
- Lift with your legs, not your back; ask for help with large or awkward items.
6.3 Dust and Fume Control
- Seal off doorways with plastic sheeting and painter’s tape.
- Use a HEPA-filter vacuum regularly to control dust.
- Open windows or use exhaust fans when working with paints or adhesives.
Section 7: Ongoing Safety and Maintenance During the Project
7.1 Daily Safety Checklist
- Inspect tools for wear or damage before each use.
- Keep first-aid kit stocked and accessible.
- Check that fire extinguisher is charged and within reach.
- Clean up spills and debris as you work—never leave hazards for later.
- Review the next day’s tasks for special hazards or material needs.
7.2 Protecting Family and Pets
- Install baby gates or temporary barriers to restrict access to the work area.
- Communicate your schedule so family members avoid the room during active work.
- Store tools and chemicals out of reach between work sessions.
7.3 Emergency Procedures
- Know the fastest exit routes from your kitchen and home.
- Post emergency contact numbers (poison control, electrician, plumber) in a visible spot.
- Keep your mobile phone charged and on hand during all work.
Conclusion: Setting Yourself Up for a Safe and Successful Kitchen Renovation
Completing a DIY kitchen renovation is a major achievement, but safety must remain your top priority from planning to final cleanup. By following this expert checklist, you’re not just avoiding injuries—you’re ensuring that your project is efficient, code-compliant, and protected by your home insurance. The steps outlined above—from rigorous PPE use to careful demolition, ongoing hazard management, and proper permitting—are not optional extras. They’re foundational to a renovation that adds value to your home without putting your family, finances, or future at risk.
Remember, there’s no shame in calling in a professional for tasks beyond your comfort or skill level. Hiring out electrical, plumbing, or structural changes can be the safest and most cost-effective decision in the long run. Ultimately, the best DIY renovators are those who know when to seek help and who prioritize safety as much as style and savings.
Use this checklist as your blueprint for every kitchen project, big or small. Stay vigilant, keep safety equipment close at hand, and double-check every step. With preparation and care, your kitchen renovation can be both transformative and trouble-free. Happy renovating!


You mention checking for asbestos and lead paint in homes built before 1980—if I’m unsure about my home’s age or past renovations, what’s the safest way to determine if I need professional testing before I start demolition?
If you’re not certain about your home’s age or renovation history, it’s best to err on the side of caution. Before starting demolition, contact your local building department or review property records to check for the construction year and any major renovations. If you’re still unsure, hiring a certified professional to inspect for asbestos and lead paint is the safest approach, as disturbing these materials without proper assessment can pose serious health risks.